Identifying Solid Donor Panels with Minimal Rust or Body Filler
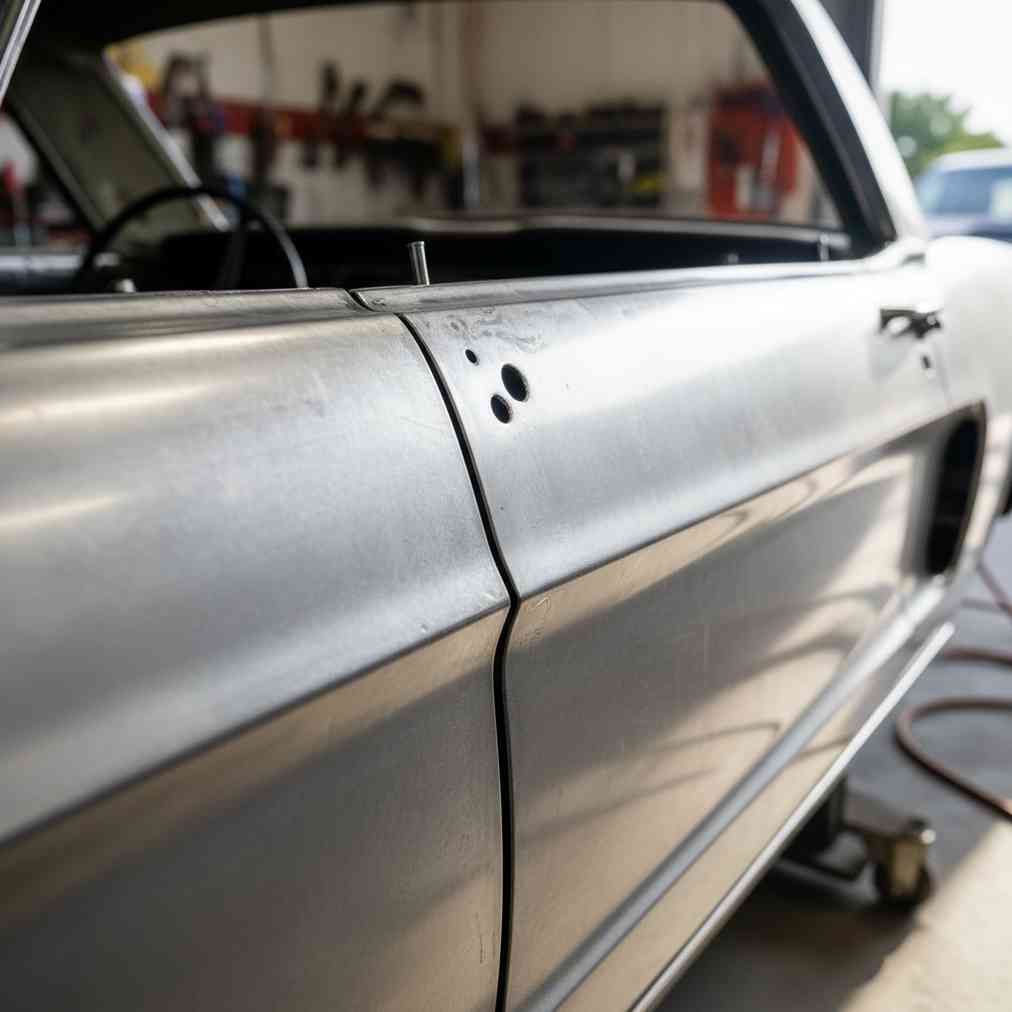
When searching salvage yards near me for donor metal, the primary goal is finding areas that have retained their original structural integrity and metal quality. Understanding the stages of rust is critical for proper assessment and successful rust repair projects.
Understanding Rust Stages for Donor Panel Assessment
- Surface Rust: Cosmetic oxidation that hasn’t penetrated the metal; often grindable and acceptable for a donor panel
- Scale Rust: Pitting that has reached deeper, causing paint to bubble or flake. This indicates compromised metal that should be avoided or cut around
- Penetrating Rust: Full perforation where the metal is eaten through, often hidden on the backside of panels or inside seams. This metal is unusable
Critical Hot Spots to Inspect
Areas that trap moisture and debris are prone to rust and should be checked thoroughly. Focus your inspection on rocker panels, cab corners, lower door skins, wheel arches, and bed floors. These locations are notorious for rust development and require careful evaluation before harvesting donor metal.
Body Filler Detection Techniques
To check for hidden body filler (which indicates previous hidden damage or rust repair), use a magnet. A weak pull over an area suggests filler beneath the paint. Some experts also recommend using a sharp screwdriver or awl to probe the metal for softness, especially in areas that look suspect, even if the surface appears solid.
Look for signs of stress or previous damage, such as broken factory spot welds, which can indicate stress from door slams or minor collisions. If a panel has been reskinned previously, it might be harder to align correctly during your repair project.
Metal Thickness and Quality Considerations
For vehicles pre-2000, the original steel is often 16–19 gauge, which is generally considered cleaner and more durable than modern, thinner steel (22–24 gauge). Matching the gauge of the donor metal to the car being repaired is ideal for maintaining structural integrity and ensuring proper fitment.
Step-by-Step Guide for Cleanly Cutting Donor Metal
Once a suitable, large section of solid sheet metal is located on the donor car, the process of extracting a usable patch panel involves careful marking and cutting. This methodical approach ensures you get the best possible donor material for your rust repair project.
Preparation and Patterning
- Clean the Area: Clear any surface debris, dirt, or loose paint from the donor panel area where you plan to cut your patch
- Create a Template (Pattern): Use painter’s tape laid over the area to capture the general shape, curves, and lines of the desired section
- Mark the Cut Line: Use a scribe (or sharp awl) to mark cut lines directly onto the metal for precise lines rather than markers, which can be too thick
When marking the template or scribe line, remember to cut outside of the final required dimension, often leaving an extra 1/8″ to 1/4″ margin for final trimming and fitting.
Cutting Methods and Tool Selection
The choice of tool depends on the salvage yard’s rules (some disallow spark-producing tools) and the complexity of the cut. Here’s a comprehensive comparison of cutting methods:
| Tool | Description & Best Use | Considerations |
|---|---|---|
| Cordless Angle Grinder with Cutoff Wheel | Most frequently used tool for cutting panels that are off the car. A thin (3″ or 4-1/2″ x 1/32″) abrasive cutoff wheel is effective | Noisy and throws sparks; may not be allowed in some self-service yards |
| Reciprocating Saw (Sawzall) | Battery-powered Sawzall with fine-tooth bi-metal blade (14 teeth per inch) is good alternative, especially where sparks are prohibited | Can be slower; requires multiple batteries for large cuts |
| Aviation Snips / Tin Snips | Excellent for making nice, even cuts, especially for trimming curves or making final adjustments after a rough cut | You need three types: left, right, and straight. Can be slow for long, straight cuts |
| Power/Air Nibblers | Good for saving time on larger patches and can make extremely sharp turns where other tools cannot | Initial cost is higher, and air-powered versions consume a lot of air |
| Metal Cutting Shears (Electric or Air) | Good for cutting straight lines smoothly, often used to rough-cut a large panel into manageable piece first | Designed for thinner metal (14 gauge or thinner) and may not handle ridges well |
Trimming and Finalizing the Patch
- Rough Cut: Use the angle grinder or Sawzall to cut the donor piece slightly larger than the scribed line
- Fine Trim: Use aviation snips or a file to carefully trim the excess material right up to the scribe line for a perfect fit
- Fitment and Flanging: Create a flange or bevel (like a 45° angle) on the edges of the patch or the opening in the car to create a V-channel for a strong butt weld or to allow for plug welds
Professional Welding Preparation Techniques
Proper preparation is essential for creating strong, long-lasting welds that will stand the test of time. The quality of your preparation work directly impacts the strength and appearance of your final repair.
Surface Preparation for Optimal Welding
Before welding, it is crucial to grind the area down to bare, clean metal. Welds on bare metal are stronger, and contaminants from paint or old coatings can cause porosity or weak spots. This step-by-step welding process demonstrates the importance of proper surface preparation.
“The overall goal is to keep the patch as small as possible to minimize the amount of metalwork required while ensuring maximum structural integrity.”
Advanced Welding Techniques
- Tapering for Flush Welds: For the cleanest result, some restorers taper the edge of the patch panel. When welded, this taper helps the patch sit flush with the surrounding metal, minimizing the need for excessive grinding and filler later
- Weld-Through Primer: Applying zinc weld-through primer to the backside of the patch panel or where the two pieces meet can help protect the seam from future rust
- Heat Management: Use proper welding techniques to avoid warping the donor metal during installation
Cost-Effective Sourcing Strategies
Finding quality donor metal at reasonable prices requires strategy and patience. When you need to sell a junk car or source parts economically, understanding market dynamics helps maximize your investment.
Best Times to Visit Salvage Yards
Timing your visits to salvage yards can significantly impact both part availability and pricing. Many yards receive new inventory on specific days, and visiting during these times increases your chances of finding fresh, quality donor metal before other customers pick through the best pieces.
Negotiation and Bulk Purchase Strategies
When purchasing multiple pieces or planning extensive restoration work, consider negotiating bulk pricing with yard management. Many facilities offer discounts for larger purchases or return customers, especially when you’re removing multiple parts from the same vehicle.
Safety Considerations and Best Practices
Safety should always be your primary concern when working in salvage yards and handling cutting tools. Proper safety equipment and techniques protect both you and others in the facility.
Essential Safety Equipment
- Eye Protection: Safety glasses or face shields when cutting or grinding
- Hand Protection: Cut-resistant gloves for handling sharp metal edges
- Respiratory Protection: Dust masks when grinding or cutting painted surfaces
- Sturdy Footwear: Steel-toed boots to protect against dropped parts or tools
Tool Safety and Maintenance
Regular tool maintenance ensures both safety and effectiveness. Keep cutting wheels properly mounted, maintain sharp edges on snips, and ensure all power tools are in good working condition. This comprehensive guide to tool safety provides additional insights for safe operation.
Quality Control and Final Inspection
Before leaving the salvage yard with your donor metal, conduct a thorough final inspection to ensure you’re getting the best possible material for your restoration project.
Pre-Purchase Inspection Checklist
- Verify metal thickness matches your original parts
- Check for hidden rust or damage on both sides of the panel
- Ensure all necessary mounting points and holes are intact
- Confirm the donor metal matches your vehicle’s year and model specifications
- Document any modifications needed before installation
Storage and Handling
Proper storage of donor metal prevents additional rust and damage before installation. Store panels in a dry environment, apply light oil coating to prevent surface rust, and handle carefully to avoid dents or scratches that could complicate your repair work.
Advanced Techniques for Complex Repairs
For more complex restoration projects, advanced techniques can help achieve professional-level results using donor car materials.
Multi-Panel Integration
When working on extensive rust damage, you may need to combine multiple donor pieces to create a complete repair section. This requires careful planning and precise fitting to ensure proper alignment and structural integrity.
Understanding data analysis techniques can help track part compatibility and pricing trends across different salvage facilities, optimizing your sourcing strategy.
Custom Modification Techniques
Sometimes donor metal requires modification to fit your specific application. Techniques such as stretching, shrinking, and reshaping can adapt donor material to unique repair situations while maintaining structural integrity.
Environmental Considerations and Sustainability
Using donor cars for rust repair represents an excellent example of automotive recycling and environmental stewardship. By reusing existing metal rather than manufacturing new parts, you’re contributing to sustainable automotive restoration practices.
Waste Reduction Benefits
- Reduces demand for new steel production
- Minimizes landfill waste from scrapped vehicles
- Conserves energy typically used in manufacturing new parts
- Supports local recycling industry and circular economy principles
The art of using donor cars for rust repair combines practical skills, environmental consciousness, and cost-effective restoration techniques. By following these comprehensive guidelines, you can source quality donor metal, execute professional-level cuts, and create lasting repairs that restore your vehicle’s structural integrity while preserving automotive history. Whether you’re working on a classic restoration or maintaining a daily driver, mastering these techniques opens up unlimited possibilities for creative and economical automotive repair solutions.
This detailed restoration process demonstrates many of these techniques in action, providing visual guidance for implementing the methods discussed in this comprehensive guide.


Leave a Reply
You must be logged in to post a comment.