Understanding Grille Types and Their Importance
Your car’s front grille serves as more than just a decorative element—it’s the defining feature that gives your vehicle its unique character and identity. When damage occurs from minor collisions, road debris, or years of UV exposure, finding the perfect replacement grille becomes essential for restoring your car’s appearance and maintaining its value.
The front grille protects your radiator and cooling system while contributing significantly to your vehicle’s aerodynamics. Whether you drive a sleek sedan, rugged truck, or compact SUV, the grille design reflects the manufacturer’s styling philosophy and your vehicle’s personality. When it’s time for a replacement, junkyards near me offer an excellent opportunity to find original equipment manufacturer (OEM) parts at substantial savings.
The Smart Economics of Junkyard Grille Shopping
Purchasing a new grille from a dealership can cost anywhere from $200 to $800 or more, depending on your vehicle’s make and model. In contrast, salvage yard grilles typically range from $25 to $150, representing savings of up to 75%. This significant cost difference makes junkyard shopping an attractive option for budget-conscious car owners seeking quality OEM parts.
Beyond the financial benefits, choosing used parts supports environmental sustainability by keeping functional parts in circulation rather than contributing to manufacturing demand for new components.
Grille Mounting Methods: What You Need to Know
Understanding how grilles attach to vehicles is crucial for successful junkyard shopping and installation. Modern vehicles use several mounting methods, each with specific removal techniques and potential failure points.
| Mounting Method | Description | Common Issues |
|---|---|---|
| Clips and Retainers | Plastic clips or “Christmas tree” push-pin retainers along edges | Brittle tabs break easily during removal |
| Bolts/Screws | 7mm or 10mm bolts near wheel wells or bumper fascia | Rust can make removal difficult |
| Full Replacement | Entire grille assembly removes from frame or bumper | Multiple connection points increase complexity |
| Insert Replacement | Only center mesh insert needs replacement | Original shell must be in good condition |
Your Complete Junkyard Grille Inspection Checklist
Success in finding the perfect replacement grille depends on thorough inspection before purchase. The most critical areas require careful examination, as certain defects can render an otherwise good grille unusable.
Priority Inspection Areas
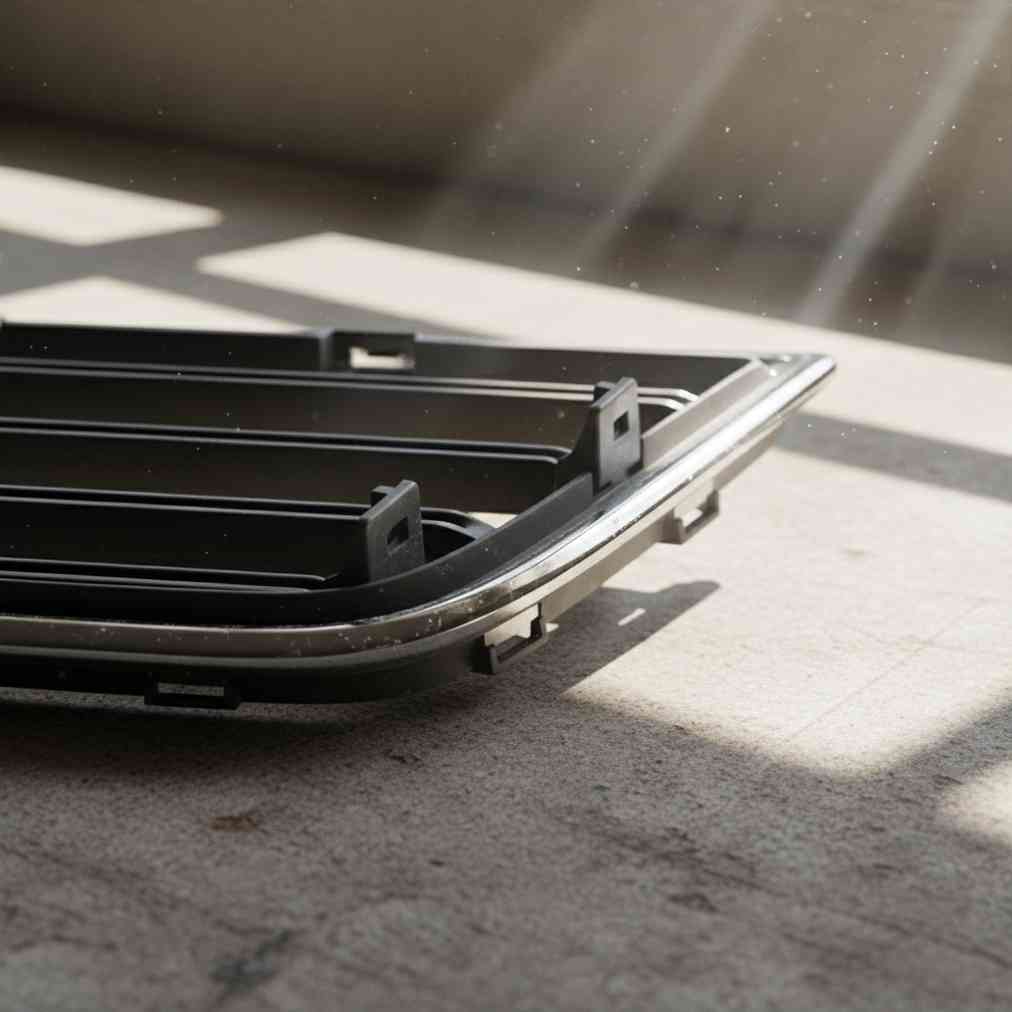
- Mounting Tabs and Clips: These are the most common failure points. Look for cracks, breaks, or missing tabs around the entire perimeter
- Plastic Condition: Check for brittleness, stress fractures, or cloudiness indicating UV damage
- Overall Structure: Examine for dents, warping, or impact damage that could affect fit
- Finish Quality: Assess chrome pitting, paint oxidation, or coating deterioration
- Emblem Areas: Verify mounting recess or clips are intact if you plan to transfer your original emblem
Identifying Sun Damage and Plastic Deterioration
Extended exposure to UV radiation causes plastic to become brittle and fade, making grilles susceptible to cracking during removal or installation. Sun-damaged grilles exhibit specific warning signs that experienced junkyard shoppers learn to recognize quickly.
Look for a dull, hazy, or chalky appearance on plastic surfaces, particularly on top edges that receive direct sunlight. On painted or chrome-finished grilles, watch for oxidation or cloudiness that indicates coating breakdown. A simple brittleness test involves gently flexing a hidden edge—if the plastic feels stiff or shows tiny stress cracks, handle it with extreme caution.
“The key to successful grille replacement is patience during removal. Rushing the process often results in broken mounting tabs, turning a perfect part into junk.”
Professional Removal Techniques for Intact Grilles
Proper removal technique determines whether you’ll take home a perfect replacement or a pile of broken plastic. Following a systematic approach minimizes the risk of damage during extraction.
Step-by-Step Removal Process
- Preparation: Research your specific vehicle’s removal procedure before visiting the yard
- Clear Obstructions: Remove all visible bolts, screws, or fasteners first
- Locate Release Points: Use trim removal tools rather than screwdrivers to prevent damage
- Work Systematically: Start at one side and progress methodically across
- Apply Gentle Heat: Slightly warm brittle tabs with careful heat application if necessary
Remember that proper tool selection makes a significant difference in success rates. Trim removal tools with thin, flat edges work better than improvised instruments that can crack plastic.
Essential Tools for Grille Removal Success
Arriving at the junkyard with the right tools dramatically improves your chances of successful grille removal. Professional-grade equipment designed for automotive trim work prevents the frustration of broken parts and wasted trips.
| Tool Category | Specific Items | Purpose |
|---|---|---|
| Trim Removal | Plastic pry tools, panel poppers | Release clips without scratching |
| Fastener Tools | 7mm, 8mm, 10mm sockets | Remove mounting bolts |
| Leverage Tools | Flexible pry bars, wedges | Maintain clip release during extraction |
| Safety Equipment | Work gloves, safety glasses | Protect against sharp edges and debris |
Testing for Quality and Compatibility
Before finalizing your purchase, perform several critical tests to ensure the grille meets your needs. Compatibility verification prevents costly mistakes and ensures proper fitment on your vehicle.
Compare the donor vehicle’s year, model, and trim level with your car’s specifications. Even within the same model year, different trim packages may use varying grille designs. Check for matching part numbers when visible, and verify that all mounting points align with your vehicle’s attachment locations.
Common Pitfalls and How to Avoid Them
Experienced junkyard shoppers learn to recognize warning signs that indicate a grille isn’t worth purchasing. Understanding these red flags saves time and prevents disappointment during installation.
- Multiple Broken Tabs: One or two damaged tabs might be repairable, but extensive damage indicates rough handling
- Severe Fading: Heavily sun-damaged plastic often becomes too brittle for reliable use
- Previous Repair Attempts: Evidence of glue, tape, or crude patches suggests underlying problems
- Mismatched Hardware: Non-factory fasteners may indicate incompatibility issues
Installation Tips for Perfect Results
Successfully installing your junkyard grille requires patience and attention to detail. Start by thoroughly cleaning both the grille and mounting surfaces to ensure proper adhesion and fit. Apply a protective coating to any exposed metal surfaces to prevent corrosion.
Test-fit the grille before final installation to identify any alignment issues. Make minor adjustments gradually, as forcing parts into place can cause damage. If you encounter resistance, double-check that all fasteners are properly positioned and that no obstructions prevent proper seating.
When to Consider Professional Help
While many grille replacements are DIY-friendly projects, certain situations warrant professional assistance. Complex mounting systems, integrated lighting elements, or vehicles requiring front-end disassembly may exceed typical home garage capabilities.
If your research reveals complex installation procedures or your vehicle has advanced driver assistance systems integrated into the grille area, consulting a qualified technician ensures proper installation and system functionality.
Maximizing Your Junkyard Investment
Transform your junkyard visit into a comprehensive parts-gathering expedition. While focusing on your grille needs, keep an eye out for other useful parts like headlight assemblies, trim pieces, or emblems that complement your restoration project.
Many yards offer bulk pricing discounts when purchasing multiple items, making it economical to address several cosmetic needs simultaneously. Document compatible vehicles during your search, as this information proves valuable for future repairs or modifications.
Making the Most of Your Purchase
Once you’ve secured the perfect grille, proper preparation ensures professional-looking results. Clean the part thoroughly, addressing any surface contamination or oxidation. Consider professional refinishing if the grille’s condition warrants it—the total cost often remains well below new part pricing.
If you have an old vehicle that’s beyond repair, consider getting cash for your junk car to fund your current project. Many car owners use proceeds from selling non-running vehicles to finance restoration work on their primary transportation.
Store your grille carefully until installation day, protecting it from impact damage and extreme temperature changes that could cause warping or cracking. With proper handling and installation techniques, your junkyard grille can provide years of reliable service while maintaining your vehicle’s attractive appearance.
Finding the perfect replacement grille at a salvage yard combines smart economics with environmental responsibility. By following proper inspection procedures, using appropriate tools, and applying careful removal techniques, you’ll successfully restore your car’s distinctive look while keeping more money in your pocket for other automotive needs.


Leave a Reply
You must be logged in to post a comment.