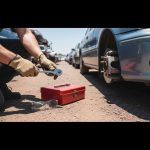
Essential Preparation for Junkyard Success
Finding and removing a used car seat from a junkyard requires careful preparation, the right tools, and a methodical approach. Success at a self-service salvage yard depends heavily on coming prepared, as time is often limited and the work can be physically demanding. The process involves much more than simply unbolting a seat – modern vehicles contain complex electrical systems and safety features that require special attention.
Tools You’ll Need for Car Seat Removal
Having the right tools is paramount to a successful junkyard visit. The difference between a quick salvage operation and a wasted trip often comes down to proper preparation. Here’s what you’ll need:
| Tool Category | Specific Tools | Why It’s Essential |
|---|---|---|
| Socket/Wrench Set | 13mm, 15mm, 9/16″ sizes with ratchet | Main floor bolt removal |
| Torx Bits | Complete set including T-55 | Modern power seat fasteners |
| Power Tools | Breaker bar, impact driver | Stubborn or rusted bolts |
| Hand Tools | Flathead/Phillips screwdrivers, pry tools | Plastic covers and trim work |
| Pliers | Locking, needle-nose, channel locks | Connector manipulation |
| Power Source | 9-volt battery or cordless drill battery | Cycling power seats for access |
The portable power source deserves special attention. Since donor cars at salvage yards typically have disconnected batteries, you’ll need your own power to move electric seats forward and backward to access all mounting points. A simple 9-volt battery can often provide enough juice to cycle the seat position.
Checking Compatibility and Condition
Before beginning removal, thoroughly inspect the seat for compatibility and condition. While finding the same make and model is ideal, many people research online to locate junkyards stocking their specific vehicle. Look for these warning signs:
- Structural damage: Frayed straps, cracked plastic mounting points
- Excessive wear: Deep stains that have turned cloth seats black
- Crash damage: Any seat from a moderate to severe accident should be avoided
- Missing parts: Ensure all necessary brackets and hardware are present
Remember, if a seat looks significantly discolored or damaged beyond easy restoration, it may be better to look elsewhere or consider other options for your vehicle needs.
Step-by-Step Removal Process
The removal process follows a specific sequence to ensure safety and efficiency. Modern car seats, especially those with power functions, contain multiple electrical connections that must be handled properly.
Positioning the Seat for Access
For power seats, proper positioning is crucial for accessing all mounting points:
- Connect your portable power source to the seat’s wiring harness
- Move the seat all the way forward to access rear mounting bolts
- Move the seat all the way backward to access front mounting bolts
- Disconnect power before proceeding with removal
This positioning step is often overlooked by first-time junkyard visitors, but it’s essential for accessing all four mounting points efficiently. Video tutorials can provide additional visual guidance for this process.
Removing Seat Rail Bolts
The actual unbolting process requires patience and the right technique:
- Remove plastic caps: Use a flathead screwdriver to carefully pry off caps covering floor bolts
- Apply penetrating oil: If bolts appear rusty, spray with penetrating oil and wait
- Remove bolts systematically: Start with easily accessible bolts first
- Use proper leverage: A breaker bar may be necessary for extremely tight bolts
Most seats are secured by four bolts total – two in front and two in the rear. The specific socket size varies by manufacturer, but 13mm, 15mm, and 9/16″ are the most common sizes encountered.
Critical Safety Procedures for Electrical Disconnection
This is the most crucial aspect of car seat removal and cannot be overlooked. Modern seats contain Supplemental Restraint System (SRS) parts like side airbags that can cause serious injury if mishandled.
SRS/Airbag Safety Protocol
Safety First: Always disconnect the negative battery terminal of the donor vehicle before touching any wiring, especially yellow connectors. Wait 10 to 90 seconds after disconnecting to allow residual power to drain.
The importance of this step cannot be overstated. Accidental airbag deployment can cause severe injury or death. Here’s the proper safety sequence:
- Locate and disconnect the negative battery terminal
- Wait the appropriate time for power drain (10-90 seconds minimum)
- Identify yellow connectors (these are always SRS-related)
- Never use metal tools on yellow connectors
- Look for release tabs before forcing any connector apart
Identifying and Disconnecting Connectors
Different types of connectors require different approaches. Understanding connector types helps prevent damage and ensures safe disconnection:
| Connector Type | Color/Identification | Safety Level | Removal Method |
|---|---|---|---|
| SRS/Airbag | Bright yellow | Critical – High Risk | Battery disconnected, gentle release tab |
| Power Function | Various colors | Moderate | Standard release mechanism |
| Sensor Wiring | Small, multiple wires | Low | Careful release tab operation |
Most connectors have a release mechanism – typically a small colored tab (black or purple) that must be slid or pulled before the main connector separates. If a connector seems stuck, look for additional release levers rather than forcing it. Channel-lock pliers can provide extra grip if needed, but always be gentle to avoid damage.
Professional Tips for Efficient Removal
Experienced junkyard visitors have developed techniques that make the process faster and safer. These insights come from years of trial and error in salvage yards.
Time-Saving Strategies
- Bring multiple socket sizes: Don’t waste time returning to your toolbox
- Work systematically: Complete electrical disconnection before starting bolt removal
- Use the right tool for the job: Impact drivers save significant time on stubborn bolts
- Plan your exit route: Consider how you’ll maneuver the seat out of the vehicle
Many first-time visitors underestimate how heavy car seats can be, especially power seats with their motors and mechanisms. Plan your lifting and removal strategy before the seat is completely free.
Common Mistakes to Avoid
Learning from others’ mistakes can save time, money, and potential injury:
- Forgetting to cycle seat position: This leaves mounting bolts inaccessible
- Rushing electrical disconnection: Take time to properly identify each connector
- Bringing inadequate tools: Torx bits are essential for modern vehicles
- Ignoring safety protocols: Never skip the battery disconnection step
- Damaging door sills: Protect the vehicle’s interior during seat removal
Special Considerations for Power Seats
Power seats present additional challenges but also opportunities. They often contain valuable motors and mechanisms that increase their salvage value, but they require more careful handling during removal.
Testing Power Seat Functions
Before removal, it’s wise to test the seat’s power functions if possible. Connect your portable power source to verify:
- Forward/backward adjustment works smoothly
- Height adjustment functions properly
- Backrest angle adjustment operates
- Any lumbar or other premium features function
Since you cannot return a seat that doesn’t work properly, this testing phase is crucial for ensuring you’re getting a functional part.
Handling Complex Wiring Harnesses
Power seats often have multiple wiring harnesses for different functions. Systematic documentation of connector locations and types can help during installation in your vehicle:
- Take photos of connector locations before disconnection
- Label connectors if you have tape available
- Note which connectors control which functions
- Identify the main power and ground connections
Post-Removal Inspection and Transport
Once the seat is successfully removed, a final inspection ensures you’re getting quality parts and haven’t missed any important details.
Final Quality Check
Before leaving the junkyard, perform this comprehensive inspection:
| Inspection Area | What to Check | Red Flags |
|---|---|---|
| Seat Rails | Smooth operation, no binding | Bent rails, missing hardware |
| Upholstery | Acceptable wear level | Deep stains, tears, burns |
| Electrical | All connectors present | Cut wires, missing plugs |
| Structure | Frame integrity | Cracks, stress fractures |
Safe Transport Considerations
Car seats are bulky and can be heavier than expected. Plan for safe transport:
- Vehicle protection: Use blankets to protect your vehicle’s interior
- Secure loading: Ensure the seat won’t shift during transport
- Two-person lift: Get help if the seat is particularly heavy
- Weather protection: Cover the seat if rain is expected
Legal and Environmental Considerations
Responsible salvage yard practices include understanding the legal and environmental aspects of parts removal. Most reputable yards have clear policies about what can and cannot be removed.
Always follow junkyard rules regarding payment, tool usage, and safety equipment. Many yards require safety glasses and closed-toe shoes. Some have specific hours for different types of removal work.
Environmental responsibility includes properly handling any fluids or materials that might spill during removal. Modern salvage operations are increasingly focused on environmental compliance and waste reduction.
Cost-Benefit Analysis of Junkyard Car Seats
Understanding the financial aspects helps determine when junkyard seats make sense versus other options:
| Factor | Junkyard Seat | New Seat | Reupholstery |
|---|---|---|---|
| Typical Cost | $50-200 | $500-2000+ | $200-800 |
| Time Investment | Half day | Order wait time | 1-2 weeks |
| Warranty | Limited/none | Full manufacturer | Shop warranty |
| Exact Match | Often possible | Guaranteed | Your original seat |
The decision often comes down to the vehicle’s age and value. For older vehicles or project cars, junkyard seats represent excellent value. For newer or higher-value vehicles, the warranty and condition of new parts may justify the higher cost.
Troubleshooting Common Installation Issues
Even with careful selection, installation challenges can arise. Being prepared for common issues saves time and frustration:
- Bolt hole misalignment: Check for proper seat rail orientation
- Connector incompatibility: Verify year and trim level match
- Height differences: Some adjustment may be needed for proper fit
- Electrical integration: Power seats may need professional programming
Many installation issues stem from incompatible parts rather than defective ones. Double-checking compatibility before removal saves significant time and effort.
Making the Most of Your Junkyard Visit
A successful junkyard visit for car seat removal combines preparation, safety awareness, and systematic execution. The process rewards those who come prepared with the right tools and knowledge while punishing those who rush or ignore safety protocols.
Remember that tools are paramount – bringing a comprehensive kit including Torx bits and a portable power source makes the difference between success and frustration. SRS safety is non-negotiable – never skip the battery disconnection step or rush electrical work around airbag systems. Finally, inspection matters – since you typically cannot return used parts, thorough evaluation before removal is essential.
The investment in time and preparation for junkyard car seat removal often pays dividends in significant cost savings and the satisfaction of successfully completing a challenging automotive task. With proper preparation and attention to safety, finding and removing a quality used car seat becomes an achievable goal for most DIY enthusiasts.


Leave a Reply
You must be logged in to post a comment.