What is a Subframe Assembly and Why Does it Matter?
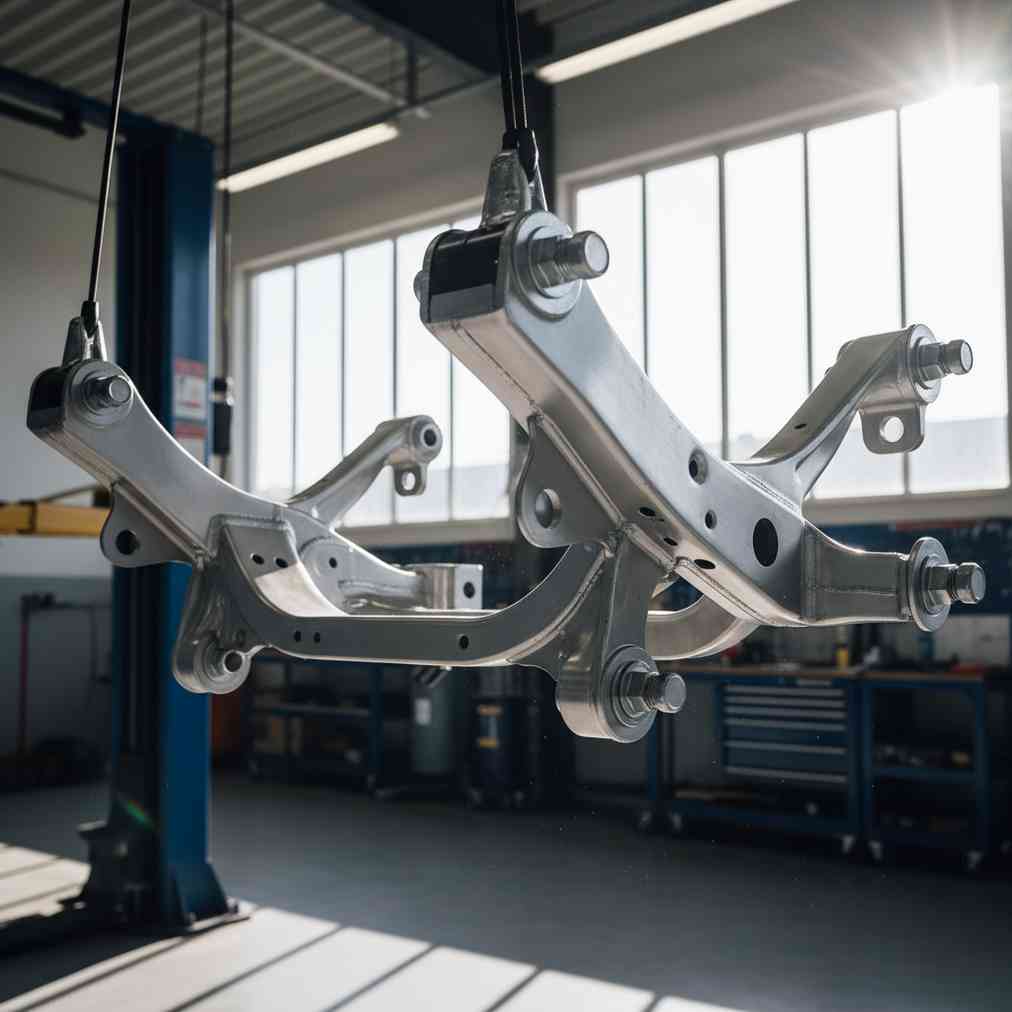
A subframe assembly, also known as an engine cradle or auxiliary frame, is a discrete structural unit within a vehicle’s chassis that serves as the backbone for critical mechanical systems. This often-overlooked part is typically bolted or welded to the main body or unibody structure and plays a vital role in your vehicle’s safety and performance.
Primary Functions of a Subframe Assembly
- Part Mounting: Serves as the primary mounting point for major mechanical systems including the engine, transmission, steering rack, and suspension parts
- Load Distribution & Vibration Isolation: Distributes high chassis loads over a wider area and isolates noise and vibrations from the passenger compartment
- Structural Integrity: Connects major parts and absorbs stress from the road, engineered for high strength and stiffness
- Safety: Engineered for impact absorption and, in electric vehicles, designed to protect the battery in frontal crashes
Subframes are typically constructed from thicker, welded or spot-welded pressed steel panels, though some modern designs utilize hydroformed tubes or aluminum extrusions for weight reduction and corrosion resistance.
How to Find Quality Used Subframe Assemblies
When sourcing a used subframe from a salvage yard near you, the goal is to find one that is structurally sound and free from significant corrosion or prior damage. The key to success lies in understanding where to look and what to avoid.
Geographic Considerations for Rust Prevention
Location matters significantly when sourcing used subframes. Vehicles from regions with heavy road salt usage, such as the Northern United States or Canada, are at much higher risk for severe subframe rust. Consider these factors:
- Prioritize vehicles from southern or western states with minimal salt exposure
- Look for aluminum subframes when available, as they offer natural corrosion resistance
- Avoid parts from areas known for harsh winters and heavy de-icing practices
- Consider the age of the donor vehicle relative to its geographic history
Best Places to Source Used Subframes
| Source Type | Advantages | Considerations |
|---|---|---|
| Self-Service Yards | Lower prices, ability to inspect thoroughly | Requires removal tools and expertise |
| Full-Service Yards | Professional removal, some warranty options | Higher cost, limited inspection opportunity |
| Online Marketplaces | Wide selection, detailed photos | Cannot physically inspect before purchase |
| Specialty Recyclers | Quality guarantee, tested parts | Premium pricing, limited availability |
Advanced Inspection Techniques for Used Subframes
A thorough inspection is vital because subtle damage can compromise steering, alignment, and overall safety. Expert mechanics recommend a systematic approach to evaluating potential replacement subframes.
Inspecting for Stress Cracks and Impact Damage
Stress cracks often occur around mounting points where the subframe bolts to the vehicle body. These hidden failures can be catastrophic if not detected early.
- Visual Inspection: Get the replacement part elevated with good lighting for close examination
- Mounting Point Analysis: Pay special attention to the four primary mounting points where the subframe attaches to the chassis
- Hidden Crack Detection: Look for hairline cracks hidden by undercoating, dirt, or rubber bushings
- Tapping Test: Gently tap suspected areas with a hammer – soft or flaking metal indicates compromise
“Not only can you not be certain without removing the subframe in many cases, the cracks have not made themselves known until after the undercoating has been ground away.” – Industry Expert
Comprehensive Rust Inspection Protocol
Rust is the primary enemy of steel subframes, especially in areas where moisture and road grime accumulate. A systematic inspection can save you from costly failures down the road.
- Pitting and Scaling: Look for deep pitting or scale buildup where protective coating has failed
- Trapped Moisture Areas: Examine seams, crevices, and areas around rubber bushings closely
- Surface vs. Structural Rust: Surface rust may be acceptable if metal remains solid, but scaling indicates deeper corrosion
- Camouflage Tactics: Be wary of fresh, uneven paint or undercoating that may hide existing damage
Essential Tools for Subframe Removal
Removing a subframe is a complex, advanced-level repair that requires significant preparation, specialized support equipment, and a comprehensive tool set. This is not a job for weekend mechanics without proper equipment.
Lifting and Support Equipment
- Vehicle Lift or Heavy-Duty Jack Stands: Essential for safe vehicle elevation and securing
- Engine Support Bar: Spans across the engine bay to support engine and transmission when unbolted
- Floor Jack with Wood Block: Used to slowly lower the heavy subframe assembly after bolt removal
Hand Tools and Power Equipment
| Tool Category | Specific Tools Needed | Purpose |
|---|---|---|
| Socket Sets | Metric sockets, deep-well sockets, extensions | Mounting bolt removal |
| Torque Tools | Torque wrenches, breaker bars | Proper reinstallation specs |
| Separation Tools | Ball joint separators, pry bars | Disconnecting suspension parts |
| Power Tools | Impact gun (use carefully) | Speeding bolt removal |
Specialized Bushing and Part Removal Tools
- Bushing Removal Tools: Hydraulic or mechanical press tools for safe bushing extraction
- Cutting Tools: Side cutters or bolt cutters for brake lines and clips when necessary
- Heat Sources: Propane torch for softening old rubber bushings during removal
Step-by-Step Inspection Checklist
Use this comprehensive checklist when evaluating a potential used subframe replacement. Each step builds upon the previous one to ensure you don’t miss critical damage indicators.
Initial Visual Assessment
- Check overall structural integrity from multiple angles
- Look for obvious bends, twists, or collision damage
- Examine the general condition of mounting points
- Assess the level of surface corrosion present
Detailed Mounting Point Inspection
- Examine each of the four primary chassis mounting points
- Look for cracked undercoating or popped spot welds
- Check for stress patterns around bolt holes
- Verify mounting point alignment and spacing
Corrosion and Material Integrity Testing
- Test suspect areas with gentle hammer tapping
- Examine areas where moisture typically accumulates
- Check for through-holes or severe wall thinning
- Evaluate the condition of threaded mounting points
Red Flags: When to Walk Away
Recognizing when a subframe is beyond salvaging can save you significant time, money, and safety risks. Some damage simply cannot be effectively repaired.
- Severe Rust: Deep pitting, through-holes, or structural scaling
- Collision Damage: Bent, twisted, or misaligned mounting points
- Previous Repair Attempts: Evidence of welding, patching, or makeshift repairs
- Crack Propagation: Visible stress cracks, especially around mounting areas
- Missing or Damaged Threads: Stripped or damaged mounting bolt holes
“It’s recommended to replace a rusting subframe instead of attempting to repair, as it might compromise its integrity.” – Automotive Repair Expert
Preparing Your Used Subframe for Installation
Once you’ve found a suitable used subframe, proper preparation before installation is crucial for longevity and performance. This preparation phase can significantly extend the life of your replacement part.
Cleaning and Surface Preparation
- Remove all surface rust using a wire wheel or sandblasting
- Thoroughly degrease all surfaces to ensure proper coating adhesion
- Clean out mounting bolt holes and threaded surfaces
- Remove any old undercoating or debris from crevices
Protective Coating Application
- Apply high-quality chassis coating like POR-15 or robust chassis paint
- Ensure complete coverage of all exposed metal surfaces
- Pay special attention to seams and moisture-prone areas
- Spray rust-proofing oil into internal cavities for final protection
Cost Considerations and Budgeting
Understanding the total cost of subframe replacement helps you make informed decisions about repair versus replacement options. The financial investment extends beyond just the part itself.
| Cost Category | Estimated Range | Notes |
|---|---|---|
| Used Subframe | $200-$800 | Varies by vehicle make/model |
| Professional Installation | $800-$2,000 | Labor-intensive job |
| Additional Parts | $100-$300 | Bushings, bolts, gaskets |
| Alignment/Calibration | $100-$200 | Required after installation |
Alternative Options: When Replacement Makes Sense
Sometimes, selling your vehicle for cash and purchasing a replacement may be more economical than subframe replacement, especially for older vehicles with multiple structural issues.
Repair vs. Replace Decision Factors
- Vehicle Age and Value: Consider total repair costs versus vehicle worth
- Additional Damage: Assess whether other structural issues exist
- Safety Implications: Never compromise on structural integrity
- Future Reliability: Consider long-term maintenance costs
Professional vs. DIY Installation Considerations
While some experienced mechanics can tackle subframe replacement, this is generally considered a job requiring professional expertise due to safety and precision requirements.
When to Choose Professional Installation
- Limited experience with major structural repairs
- Lack of proper lifting and support equipment
- Need for warranty coverage on the work performed
- Vehicle requires special procedures or calibrations
DIY Considerations for Experienced Mechanics
- Access to proper tools and workspace
- Understanding of torque specifications and procedures
- Ability to perform post-installation alignment and testing
- Knowledge of safety protocols for heavy part handling
Safety Reminders and Final Recommendations
Subframe replacement is a critical safety repair that directly affects your vehicle’s structural integrity, handling, and crashworthiness. Never compromise on quality or proper installation procedures when dealing with such fundamental structural parts.
- Always prioritize structural integrity over cost savings
- Use proper torque specifications during installation
- Perform post-installation alignment and safety checks
- Consider professional installation for peace of mind
- Keep detailed records of the repair for future reference
Remember that finding and inspecting a quality used subframe assembly requires patience, knowledge, and the right tools. When done correctly, this approach can provide a cost-effective solution for major structural repairs while maintaining vehicle safety and performance standards. The investment in proper inspection techniques and quality parts will pay dividends in reliability and safety for years to come.


Leave a Reply
You must be logged in to post a comment.