Understanding Your Side Mirror Type
Before you begin the removal process, it’s crucial to identify what type of side view mirror your vehicle has. This knowledge will determine the correct replacement part and influence the complexity of the electrical work involved.
Power Mirrors
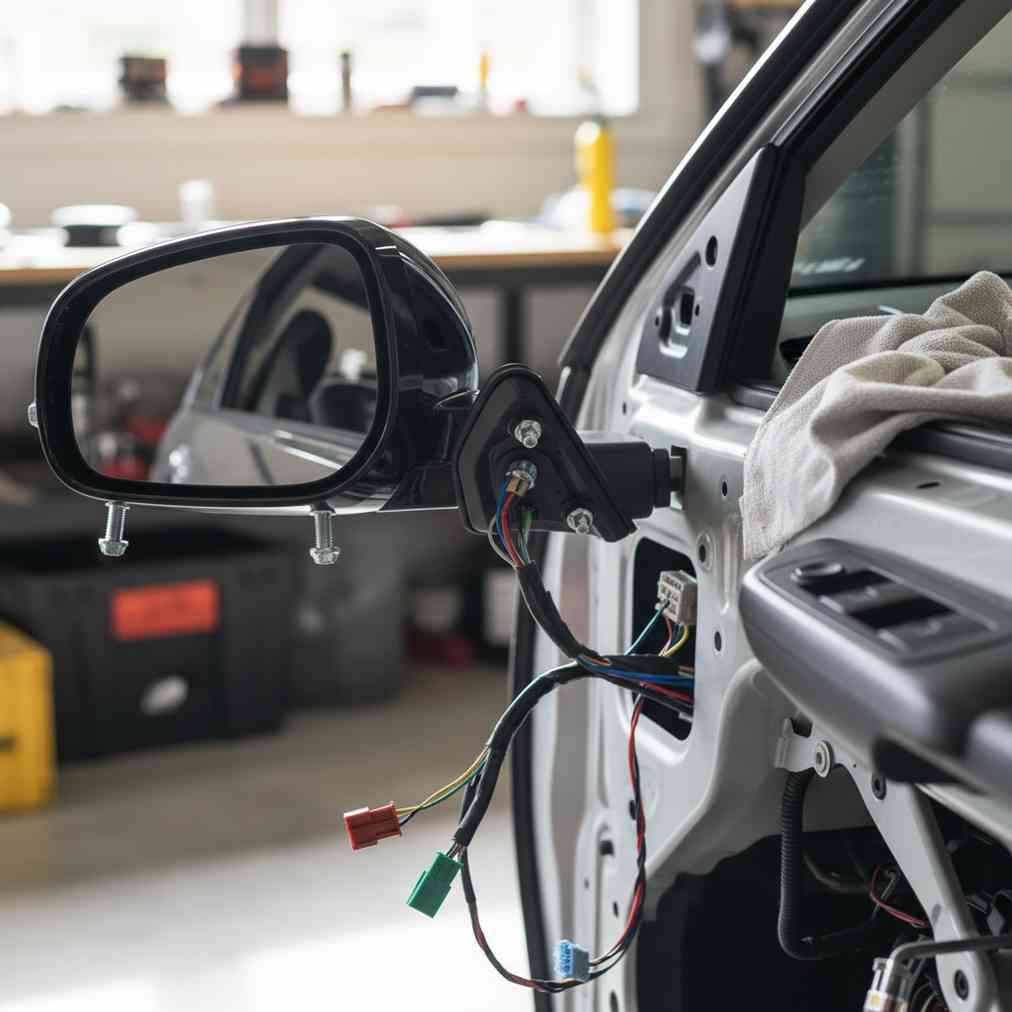
Power mirrors are electrically adjustable from inside the vehicle through a control switch, typically located on the driver’s door armrest. These mirrors require careful handling of electrical connections during removal and will have a wire harness that needs to be properly disconnected.
Heated Mirrors
Heated mirrors often come as a feature combined with power mirrors and are controlled through the rear window defogger switch. You can confirm if your mirror has heating capability by checking for a defrost option near the mirror control panel or by activating the front/rear defrost and feeling the mirror glass for warmth.
Manual Mirrors
Manual mirrors are adjusted by hand or through a mechanical lever inside the door. These typically have the simplest removal process, with either no electrical connections or minimal wiring harnesses to manage.
Pro Tip: Always ensure your replacement mirror matches the exact design, shape, and features of your original part. This includes power adjustment, heating elements, turn signals, and blind spot monitoring systems for proper fit and function.
Essential Tools and Safety Preparations
Before starting any mirror removal project, gather the necessary tools and take proper safety precautions. For those looking to source replacement parts affordably, visiting a local junkyard near me can provide significant cost savings over new parts.
- Basic hand tools: Phillips and flathead screwdrivers, socket set (typically 10mm)
- Specialty tools: Plastic trim removal tools, panel clip removal tools
- Safety equipment: Work gloves, safety glasses
- Electrical safety: Disconnect the negative battery cable for power mirrors
Accessing the Mirror Mounting Points
The side view mirror assembly is universally secured to the door frame by three mounting bolts or nuts accessible from inside the door. The challenge lies in accessing these fasteners, which requires removing interior trim pieces.
Method 1: Interior Triangle Trim Removal (Easiest Access)
Many vehicles allow access through a small interior trim piece called the sail panel or triangle trim, located at the interior corner of the door near the mirror base.
- Disconnect the negative battery cable for safety
- Locate the small triangular trim piece covering the mirror mounting area
- Use a plastic trim removal tool to gently pry away the panel
- Look for small gaps or notches to insert your tool safely
- Once removed, the mounting nuts should be visible
Method 2: Complete Door Panel Removal (Full Access)
When the triangle trim method doesn’t provide sufficient access, complete door panel removal becomes necessary. This approach, while more involved, gives you full access to all mounting points and electrical connections.
| Step | Action Required | Common Locations |
|---|---|---|
| 1 | Remove interior screws | Door handle, armrest pocket, panel edges |
| 2 | Remove door handle/pull | Behind decorative covers |
| 3 | Release panel clips | Bottom and side edges of panel |
| 4 | Disconnect wiring | Window controls, locks, mirror switch |
For detailed guidance on automotive electronics and data management systems that control these mirror functions, resources like understanding JSON data formats can be helpful for modern vehicle diagnostics.
Step-by-Step Mirror Removal Process
Electrical Disconnection
Once you have access to the mounting area, locate the wiring harness connecting the mirror to the vehicle’s electrical system. This connector typically features a small clip or tab that must be pressed to release the connection safely.
Removing the Mounting Fasteners
With electrical connections safely disconnected, use the appropriate socket (commonly 10mm) to remove the three mounting nuts or bolts. Support the mirror assembly with one hand while removing the final fastener to prevent the mirror from falling.
- Work systematically from one fastener to the next
- Keep track of all nuts, bolts, and washers for reinstallation
- Note the orientation of any spacers or gaskets
- Take photos before removal for reference during installation
Finding Replacement Mirrors
When sourcing replacement mirrors, you have several options. For budget-conscious repairs, visiting salvage yards can provide OEM used side mirrors from the junkyard at significant savings. If you need to dispose of your damaged vehicle, consider getting an instant quote for junk car to help offset repair costs.
For those interested in emerging automotive technologies and trends, resources on technology trends outlook 2025 can provide insights into future vehicle mirror technologies.
Installation Process
Installing the new mirror follows the reverse process of removal, but requires careful attention to proper alignment and torque specifications.
Positioning and Alignment
- Feed the new mirror’s wiring harness through the door opening
- Align the mounting studs with the holes in the door frame
- Hand-tighten the nuts initially to ensure proper seating
- Use factory torque specifications when available
- Avoid over-tightening to prevent thread damage or housing cracks
Electrical Reconnection
Reconnect the electrical connector, ensuring it clicks securely into place. Test all mirror functions before reassembling the door panel:
- Power adjustment in all directions
- Heated mirror function (if equipped)
- Turn signal operation (if equipped)
- Auto-dimming features (if equipped)
Common Challenges and Solutions
| Challenge | Cause | Solution |
|---|---|---|
| Stubborn trim panels | Aged plastic clips | Apply gentle heat, use proper trim tools |
| Corroded fasteners | Weather exposure | Use penetrating oil, consider replacement bolts |
| Damaged wiring | Age or previous repairs | Inspect connectors, repair or replace as needed |
| Programming requirements | Modern vehicle systems | Consult vehicle manual or professional assistance |
Professional Tips for Success
Experienced technicians recommend several best practices for successful mirror replacement projects.
- Document everything: Take photos before disassembly for reference
- Work in good lighting: Proper visibility prevents damage and mistakes
- Use quality tools: Proper tools prevent damage to trim and fasteners
- Test before final assembly: Verify all functions work correctly
- Check for programming needs: Some modern mirrors require dealer programming
For research into automotive repair methodologies and best practices, exploring research topics for students in automotive technology can provide valuable insights.
When to Seek Professional Help
While mirror replacement is generally straightforward, certain situations warrant professional assistance:
- Complex electrical systems: Vehicles with advanced driver assistance features
- Structural damage: When the door frame or mounting points are damaged
- Programming requirements: Modern mirrors that need dealer-level diagnostics
- Insurance claims: When proper documentation and OEM parts are required
Cost Considerations
Understanding the cost implications helps you make informed decisions about mirror replacement:
| Mirror Type | New Parts Cost | Used Parts Cost | Labor (if applicable) |
|---|---|---|---|
| Manual Mirror | $50-150 | $15-40 | $50-100 |
| Power Mirror | $100-300 | $25-75 | $75-150 |
| Heated/Power Mirror | $150-500 | $40-120 | $100-200 |
Maintenance and Prevention
Proper maintenance can extend mirror life and prevent future replacement needs:
- Regular cleaning: Remove dirt and salt buildup that can cause corrosion
- Lubrication: Keep adjustment mechanisms moving smoothly
- Weather protection: Park in covered areas when possible
- Gentle operation: Avoid forcing stuck adjustment mechanisms
Understanding automotive systems and their interconnections becomes increasingly important as vehicles incorporate more digital technologies. Resources on JSON data formats can be valuable for understanding how modern vehicle systems communicate.
Conclusion
Successfully removing and replacing a side view mirror is an achievable DIY project with proper preparation and the right approach. Whether dealing with power, heated, or manual mirrors, the key lies in careful identification of your mirror type, proper access to mounting points, and methodical work through the electrical and mechanical connections.
Remember that safety should always be your first priority, and don’t hesitate to seek professional help when dealing with complex electrical systems or when you’re unsure about any aspect of the repair. With patience and attention to detail, you can save significant money while gaining valuable mechanical experience.
For those interested in the broader implications of automotive technology and future trends, exploring resources on digital economy trends can provide insights into how vehicle technologies continue to evolve.


Leave a Reply
You must be logged in to post a comment.