Why Choose Junkyard Parts for Your Suspension Overhaul
Overhauling your vehicle’s suspension system doesn’t have to break the bank. With careful planning and strategic sourcing from junkyards near me, you can completely refresh your suspension for under $200 while achieving the same performance results as expensive new parts. This comprehensive guide will walk you through every step of the process, from identifying the right donor vehicles to proper installation techniques.
The key to success lies in understanding which suspension parts to prioritize, how to inspect used parts for reliability, and mastering the installation process. By following this proven approach, you’ll save 50-85% compared to new parts while maintaining safety and performance standards.
Essential Suspension Parts to Source from Salvage Yards
A successful suspension overhaul focuses on three primary categories of parts that directly impact your vehicle’s ride quality and handling characteristics:
Struts and Shock Absorbers
These crucial parts control your vehicle’s bounce and rebound, ensuring your tires maintain proper contact with the road surface. Understanding how suspension systems work helps you appreciate why these parts are fundamental to vehicle safety and performance.
Control Arms with Ball Joints and Bushings
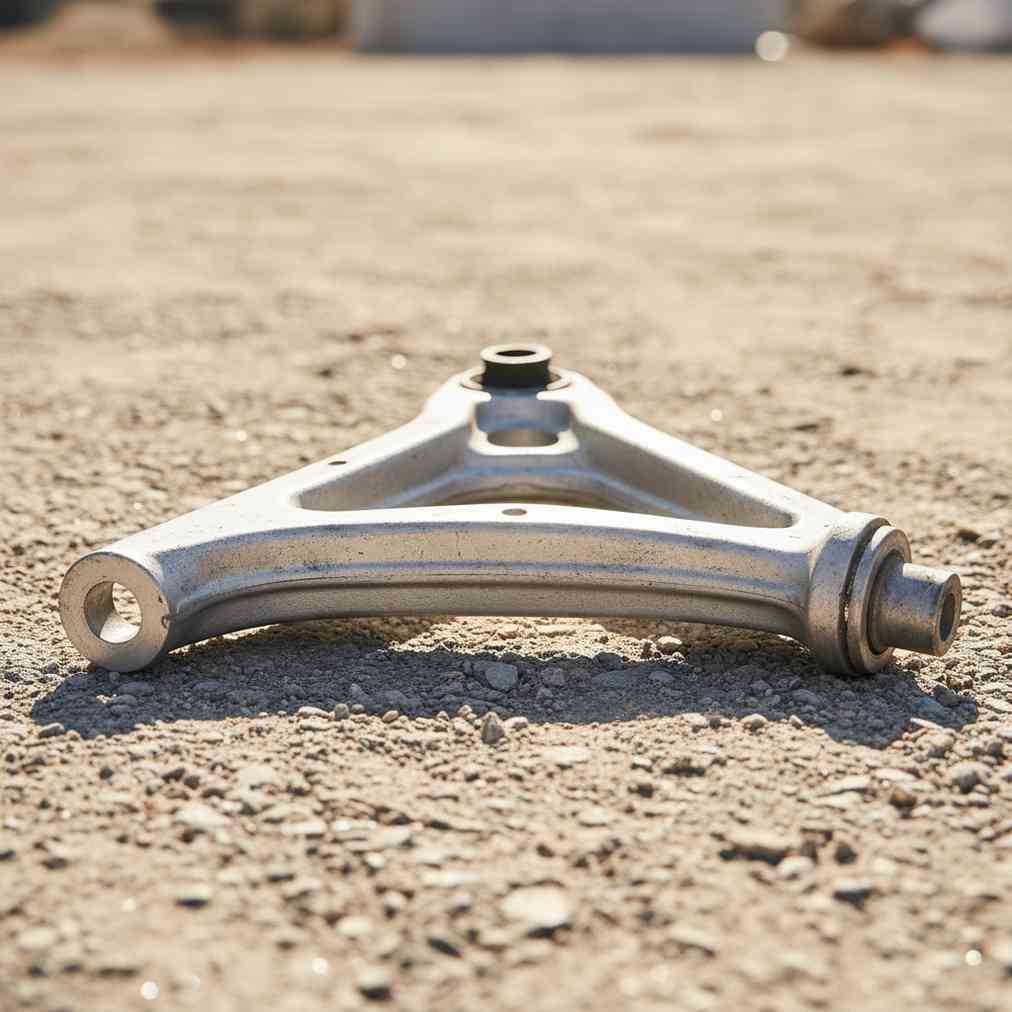
Control arms serve as the critical connection between your vehicle’s frame and wheels, supporting the entire weight while allowing for controlled movement. The integrated ball joints and rubber bushings are often the first parts to show wear in high-mileage vehicles.
Sway Bars and End Links
Also known as anti-roll bars, these parts connect opposite sides of your suspension to minimize body roll during cornering. They’re essential for maintaining vehicle stability and predictable handling characteristics.
Pre-Shopping Preparation Strategy
Success in sourcing quality junkyard suspension parts begins long before you arrive at the salvage yard. Proper preparation can mean the difference between a successful $200 overhaul and a frustrating experience with incompatible or worn-out parts.
Vehicle Compatibility Research
Target donor vehicles that match your exact year, make, and model specifications. Many manufacturers share suspension designs across multiple model years and even different vehicle lines, so research which parts are interchangeable with your specific vehicle.
- Verify part numbers and compatibility through online databases
- Focus on lower-mileage donor vehicles when possible
- Avoid vehicles with front-end collision damage
- Check for excessive rust on frame rails and mounting points
Essential Tool Preparation
Most salvage yards operate on a bring-your-own-tools basis, making proper tool preparation absolutely critical for success.
| Tool Category | Specific Tools Needed | Purpose |
|---|---|---|
| Safety Equipment | Safety glasses, work gloves, steel-toed boots | Personal protection |
| Lifting Tools | Floor jack, jack stands | Vehicle support and access |
| Hand Tools | Socket set, wrenches, breaker bar | Fastener removal |
| Specialty Tools | Ball joint separator, pry bar | Part separation and inspection |
Critical Inspection Checklist for Used Suspension Parts
The inspection phase determines the success of your entire project. Since you’re working with used auto parts, thorough evaluation ensures both safety and longevity of your investment.
Control Arm Inspection Protocol
Control arms endure significant stress and require careful evaluation of multiple wear points:
- Metal Structure: Look for cracks, bends, or deformation in the arm itself
- Bushing Condition: Check rubber bushings for tears, cracking, or excessive deflection
- Ball Joint Assessment: Inspect boots for damage and test for vertical play
- Mounting Points: Verify threads are intact and not stripped or damaged
Strut and Shock Absorber Evaluation
These parts are critical for vehicle stability and require specific inspection criteria:
Pro Tip: Any visible fluid leakage, even minor weeping, indicates internal seal failure and should result in rejection of the part.
- Examine the shock body for rust, dents, or fluid leakage
- Test piston rod for smooth extension and compression
- Check mounting hardware for wear or damage
- Verify spring seats are not cracked or deformed
Ball Joint Inspection Technique
Ball joints are safety-critical parts that require precise evaluation methods. Professional inspection techniques can help you identify worn joints before they become dangerous.
| Inspection Point | Acceptable Condition | Reject If Present |
|---|---|---|
| Boot Integrity | Flexible, intact rubber | Cracks, tears, or grease leakage |
| Joint Movement | Smooth, controlled motion | Excessive play or binding |
| Stud Condition | Clean, undamaged threads | Worn or damaged threads |
Cost Analysis and Budget Breakdown
Understanding the financial benefits of salvage yard parts helps justify the time investment while ensuring you stay within your $200 budget constraint.
| Part Category | Junkyard Cost | New Aftermarket | OEM New | Savings Potential |
|---|---|---|---|---|
| Control Arms (Pair) | $40-$80 | $150-$350 | $300-$600 | 75-85% |
| Struts/Shocks (Pair) | $50-$100 | $120-$300 | $250-$500 | 65-80% |
| Sway Bar Links | $10-$25 | $40-$100 | $60-$150 | 70-85% |
| Total Project Cost | $100-$205 | $310-$750 | $610-$1,250 | 50-85% |
These cost estimates demonstrate how strategic sourcing from pull-your-own-parts facilities can deliver substantial savings while providing OEM quality parts that often surpass aftermarket alternatives in fit and finish.
Step-by-Step Removal Process
Efficient part removal requires systematic approach and proper technique to avoid damage while maximizing your time at the salvage yard.
Vehicle Preparation and Safety
- Secure the donor vehicle with proper jack and jack stand placement
- Remove wheels to access suspension mounting points
- Spray penetrating oil on rusted fasteners before attempting removal
- Take photos of part orientation for reference during installation
Systematic Disassembly Order
Following proper sequence prevents part damage and speeds removal process. Professional disassembly techniques ensure you don’t create unnecessary complications.
- Step 1: Disconnect sway bar end links and bushings
- Step 2: Separate ball joints using proper separator tools
- Step 3: Remove control arm mounting bolts
- Step 4: Extract struts after disconnecting top mounting nuts
- Step 5: Collect all associated hardware and brackets
Professional Installation Techniques
Proper installation is crucial for safety and longevity. Many DIY enthusiasts focus on part sourcing but overlook critical installation details that affect performance.
Bushing Installation Best Practices
Rubber bushings require specific installation techniques to prevent premature failure:
Critical Warning: Never fully torque bushing bolts while the suspension hangs free. Final torquing must occur at normal ride height to prevent bushing damage.
- Install bushings with vehicle at normal ride height
- Apply manufacturer-specified torque values
- Use proper sequence for multi-bolt installations
- Avoid over-compression of rubber bushings
Strut and Shock Installation Protocol
These parts require precise installation to maintain vehicle geometry and safety. Detailed installation guides like this comprehensive Volvo rebuild demonstrate proper techniques for complex installations.
- Verify correct orientation before final mounting
- Ensure spring seats align properly
- Check for interference with surrounding parts
- Test suspension travel before final assembly
Quality Control and Testing Procedures
After installation, systematic testing ensures your suspension overhaul meets safety and performance standards.
Post-Installation Inspection
- Verify all fasteners are properly torqued
- Check for proper alignment of all parts
- Test suspension travel and articulation
- Examine for any interference or binding
Road Testing Protocol
Systematic road testing reveals installation issues before they become safety hazards:
- Start with low-speed parking lot testing
- Gradually increase speed while monitoring for unusual noises
- Test braking performance and steering response
- Schedule professional alignment within 100 miles
Advanced Money-Saving Strategies
Experienced DIY mechanics employ additional strategies to maximize savings while maintaining quality standards.
Timing Your Salvage Yard Visits
Strategic timing can significantly impact both part availability and pricing:
- Visit during weekday mornings for best selection
- Take advantage of seasonal sales and promotions
- Build relationships with yard staff for insider information
- Monitor new inventory arrivals through yard websites
Part Condition Upgrades
Simple refurbishment can dramatically improve used part performance:
- Clean and paint control arms to prevent rust
- Replace rubber boots on serviceable ball joints
- Refinish mounting hardware for corrosion protection
- Lubricate grease fittings before installation
Common Pitfalls and How to Avoid Them
Learning from common mistakes saves time, money, and potential safety issues during your suspension overhaul project.
Part Compatibility Issues
- Verify exact year and model compatibility before purchase
- Check for running production changes within model years
- Confirm mounting point dimensions match your vehicle
- Avoid mixing parts from different suspension designs
Hidden Damage Recognition
Some forms of wear aren’t immediately obvious but can cause premature failure:
| Hidden Damage Type | Detection Method | Risk Level |
|---|---|---|
| Internal Shock Wear | Compression/rebound test | High – Safety Risk |
| Bushing Deterioration | Flexibility and bonding check | Medium – Performance Impact |
| Ball Joint Internal Wear | Movement and play testing | High – Safety Risk |
Environmental and Economic Benefits
Choosing used suspension parts provides benefits beyond immediate cost savings. This approach supports environmental sustainability by reducing manufacturing waste and resource consumption while keeping functional parts out of landfills.
Additionally, many salvage yards now offer limited warranties on used parts, providing added confidence in your purchase decision. These warranties typically range from 30 days to six months, giving you protection against premature failure.
When to Consider Professional Help
While this guide enables most DIY enthusiasts to complete a successful suspension overhaul, certain situations warrant professional assistance:
- Complex multi-link suspension systems requiring special tools
- Vehicles with electronic suspension control systems
- Situations where precise spring compression is required
- Post-installation wheel alignment (always recommended)
Maximizing Your Investment
Your successful $200 suspension overhaul represents significant value, but proper maintenance ensures long-term satisfaction. Regular inspections, appropriate lubrication, and prompt attention to unusual noises or handling changes will maximize the lifespan of your salvaged parts.
Consider documenting your project with photos and notes for future reference. This documentation proves valuable for warranty claims, future maintenance, and sharing knowledge with other DIY enthusiasts.
If you’re looking to upgrade your current vehicle instead of repairing it, getting an instant quote for your junk car can provide funds for a better starting platform for your automotive projects.
Conclusion: Achieving Professional Results on a Budget
Successfully overhauling your suspension for under $200 using junkyard parts requires careful planning, thorough inspection, and proper installation techniques. By following this comprehensive guide, you can achieve professional-quality results while developing valuable mechanical skills and saving substantial money.
Remember that suspension work directly impacts vehicle safety, so never compromise on quality or proper installation procedures. When done correctly, your salvage yard suspension overhaul will provide years of reliable service while demonstrating the value of strategic DIY automotive repair.
The knowledge gained through this project applies to future repairs and maintenance, making you a more capable and confident vehicle owner. Your $200 investment in parts, combined with your time and effort, delivers value far exceeding the financial savings alone.


Leave a Reply
You must be logged in to post a comment.