Why Proper Car Stereo Removal Matters for Resellers and DIY Enthusiasts
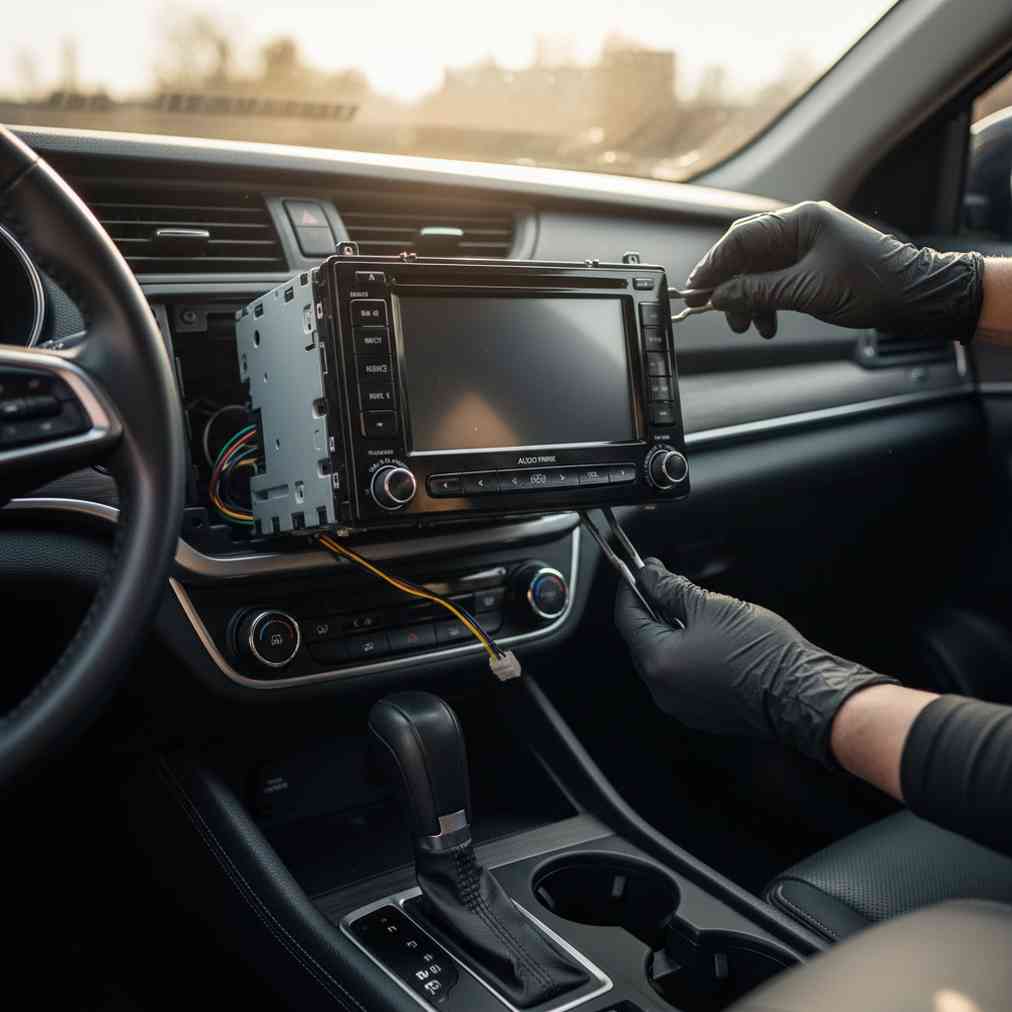
Removing a factory car stereo and speakers without damaging the dashboard is a crucial skill for parts resellers, automotive restorers, and DIY enthusiasts. Whether you’re selling your junk car and want to keep valuable parts, or sourcing replacement stereos from salvage yards, maintaining the integrity of both the stereo unit and surrounding trim significantly impacts their resale value.
Factory radios and speakers are high-value items in the used parts market, especially for restoration projects where authenticity matters. A properly removed OEM stereo can fetch substantially more money than one damaged during extraction, making the investment in proper tools and technique worthwhile.
Essential Safety Preparations Before Starting
Safety should always be your first priority when working with automotive electrical systems. Before attempting to remove any car stereo or speaker, follow these critical safety steps:
- Disconnect the negative battery cable to prevent electrical shorts
- Wait at least 10 minutes after disconnecting to allow airbag systems to discharge
- Locate your vehicle’s fuse box and identify the radio fuse as a backup safety measure
- Gather all necessary tools before starting to minimize time with panels removed
- Ensure adequate lighting in your work area
Professional automotive recyclers at salvage yards near you always follow these safety protocols to protect both workers and valuable inventory. The small investment of time in safety preparation prevents costly mistakes and potential injury.
Specialized Tools Required for Damage-Free Removal
Using the correct tools is the difference between a clean extraction and expensive damage. Professional parts pullers rely on specific tools designed for automotive trim and stereo removal.
Radio Removal Keys (DIN Tools)
Most factory head units are secured by internal locking mechanisms rather than external screws. Radio removal keys, also called DIN tools, are specifically shaped metal or plastic implements designed to release these internal clips without forcing the unit.
- Universal DIN keys work with most European and some domestic radios
- Manufacturer-specific tools for Ford, GM, Chrysler, and import brands
- Flat blade tools for newer push-button release systems
- Hook-style tools for side-mounted release tabs
Trim Panel Removal Tools
Dashboard and door panel trim pieces are held by plastic clips that can crack easily if removed improperly. Plastic pry tools are essential for preserving the integrity of these valuable trim pieces.
| Tool Type | Best Use | Material |
|---|---|---|
| Wide Pry Tools | Large trim panels | Hard plastic/nylon |
| Thin Wedge Tools | Tight gaps and clips | Flexible plastic |
| Pick Tools | Individual clip release | Metal with plastic tips |
| Panel Pullers | Stubborn panels | Reinforced plastic |
Step-by-Step Head Unit Removal Process
The systematic approach to stereo removal varies by vehicle, but following this general sequence will help prevent damage across most makes and models.
Step 1: Identify and Remove Surrounding Trim
Most car stereos are surrounded by plastic bezels or integrated into larger dashboard assemblies. Trim removal is critical because forcing a stereo out without removing surrounding panels often results in cracked plastic or broken mounting points.
- Look for visible screws around the stereo area – remove these first
- Identify clip locations by gently probing panel edges with plastic tools
- Work systematically around the panel, releasing clips one at a time
- Support the panel as you remove it to prevent stress on remaining clips
Some vehicles require removal of HVAC controls or other surrounding panels before accessing the stereo. Take photos during disassembly to aid in proper reassembly, especially if you’re planning to reinstall parts later.
Step 2: Locate and Use Radio Release Mechanisms
With trim removed, you’ll typically see slots or holes on the sides of the stereo faceplate. These are access points for the radio removal keys. The approach varies by manufacturer:
- Ford/Mercury: Usually require simultaneous insertion of tools on both sides
- GM vehicles: Often use a different key style with multiple prongs
- Chrysler products: May have push-button releases or spring-loaded mechanisms
- Import vehicles: Vary widely, but most use standard DIN-style releases
Insert the appropriate tools and gently pull the stereo forward while maintaining pressure on the release mechanisms. The unit should slide out smoothly without excessive force.
Step 3: Disconnect Wiring Harnesses
Modern factory stereos typically have multiple connectors for power, speakers, and vehicle integration systems. Document connector positions before disconnection to ensure proper identification later.
- Main power connector – Usually the largest, contains power and ground wires
- Speaker harness – Connects to individual speakers or amplified systems
- Antenna connector – Coaxial cable for radio reception
- Integration connectors – For steering wheel controls, OnStar, or other vehicle systems
Speaker Removal Techniques
Speaker removal typically involves accessing door panels, dashboard areas, or rear deck locations. Each presents unique challenges, but the same principles of careful trim removal apply.
Door Panel Speaker Access
Door-mounted speakers require removal of the door panel, which is often held by a combination of screws and plastic clips. The process generally follows this sequence:
- Remove door handle trim and any visible screws
- Locate and remove screws typically hidden behind speaker grilles or trim pieces
- Use trim tools to release plastic clips around the panel perimeter
- Lift the panel up and out to clear window channel clips
- Disconnect window and door lock control connectors
With the panel removed, speakers are usually held by 3-4 screws accessible from the front. Premium factory speakers, especially those from luxury vehicles, can be quite valuable in the used parts market.
Dashboard and Rear Speakers
Dashboard speakers may be accessed from above by removing grille covers, or may require partial dashboard disassembly. Rear speakers in sedans are often accessed through the rear deck, while SUVs and wagons may have speakers in side panels or tailgate areas.
Common Mistakes That Cause Damage
Understanding what not to do is often as important as proper technique. These common mistakes can turn a valuable salvage operation into an expensive lesson:
- Using metal tools on plastic trim – Screwdrivers and putty knives easily scratch or crack delicate interior surfaces
- Forcing stuck panels – Hidden clips or screws are usually the culprit when panels won’t release
- Ignoring wire harness routing – Pulling hard on stuck connectors can damage both the harness and the connector
- Skipping safety steps – Working with power connected risks shorts and airbag deployment
- Not documenting the process – Poor documentation makes reassembly difficult or impossible
Professional salvage operations maintain high part quality by training staff to recognize these potential issues before they become problems. Combining proper technique with quality tools ensures consistent results across different vehicle makes and models.
Maximizing Resale Value of Extracted Parts
The difference between a professionally extracted stereo and one that was forced out can be hundreds of dollars in resale value. Buyers of used OEM stereos are typically restoration enthusiasts or owners seeking exact replacements, and they pay premium prices for pristine parts.
Factors That Affect Used Stereo Values
| Condition Factor | Impact on Value | Prevention Method |
|---|---|---|
| Cracked housing | -50% to -70% | Use proper removal tools |
| Broken mounting tabs | -40% to -60% | Never force extraction |
| Damaged connectors | -30% to -50% | Gentle harness removal |
| Missing trim pieces | -20% to -40% | Keep all associated parts |
| Scratched faceplate | -15% to -30% | Careful handling and storage |
Market Demand for Factory Audio Equipment
The market for used factory stereos is robust, driven by several factors that make proper extraction techniques worthwhile:
- Restoration authenticity – Classic car restorers need original equipment for period correctness
- Vehicle integration – Modern factory stereos integrate with steering wheel controls, vehicle computers, and safety systems
- Replacement costs – New OEM stereos from dealerships can cost $500-$2000 or more
- Availability issues – Discontinued models become increasingly valuable as new stock depletes
Premium brands like Bose, Mark Levinson, Harman Kardon, and Bang & Olufsen command particularly high prices in the used market, making careful extraction even more critical for these high-value units.
Vehicle-Specific Removal Considerations
While general principles apply across most vehicles, certain makes and models have unique challenges that require specific approaches.
European Vehicles
BMW, Mercedes-Benz, Audi, and Volkswagen often use more complex integration between the stereo and vehicle systems. These units may require coding or programming when moved between vehicles, but their complexity also makes them more valuable in the used market.
Domestic Trucks and SUVs
American truck manufacturers often integrate stereos deeply into dashboard assemblies, requiring removal of multiple trim panels and sometimes HVAC controls. However, these vehicles are also common in salvage yards, making parts readily available for practice and perfecting techniques.
Import Compact Cars
Honda, Toyota, and Nissan typically use straightforward mounting systems, but space constraints in compact cars can make access challenging. These vehicles also represent high-volume segments, making extracted parts easier to sell.
Professional Tips for Efficient Extraction
Experienced parts pullers develop techniques that speed the process while maintaining quality. These professional approaches can help both commercial salvagers and DIY enthusiasts improve their results.
- Work in good lighting – Proper illumination prevents mistakes and speeds identification of clips and mounting points
- Keep tools organized – A systematic tool layout prevents hunting for the right implement mid-job
- Take progressive photos – Document each step for reassembly or to aid future similar vehicles
- Group related parts – Keep stereos with their trim pieces and wiring harnesses together
- Clean parts immediately – Remove dirt and debris before storage to maintain appearance
“The key to profitable parts extraction is treating every removal like the part will be installed in your own vehicle. That attention to detail translates directly to higher resale values and satisfied customers.”
– Master Automotive Recycler, 25+ years experience
Environmental and Legal Considerations
Proper stereo and speaker removal also involves responsible handling of electronic waste and compliance with local regulations. Most areas have specific requirements for electronic device disposal and recycling.
When extracting parts from vehicles destined for scrapping, ensure that any remaining electronic materials are properly recycled. Many modern automotive systems contain valuable materials that should be recovered rather than simply discarded.
Building Your Extraction Toolkit
Assembling the right tools for stereo and speaker removal doesn’t require a massive investment, but choosing quality implements pays dividends in both efficiency and part preservation.
Essential Tool Checklist
- Radio removal key set – Universal DIN tools plus manufacturer-specific options
- Plastic pry tool set – Various sizes and shapes for different trim applications
- Basic hand tools – Screwdrivers, pliers, and trim clip removers
- Safety equipment – Gloves, safety glasses, and knee pads
- Documentation tools – Camera or smartphone for progress photos
- Storage containers – To keep small parts organized during disassembly
Quality tools from reputable automotive supply companies last longer and perform better than cheap alternatives. The initial investment quickly pays for itself in reduced part damage and faster extraction times.
Conclusion: Mastering the Art of Clean Extraction
Successfully removing car stereos and speakers without damaging surrounding trim requires patience, proper tools, and systematic technique. Whether you’re a professional parts dealer, restoration enthusiast, or DIY mechanic, the skills and methods outlined in this guide will help you extract maximum value from automotive audio equipment.
Remember that the goal extends beyond simply removing the part – you’re preserving value, maintaining authenticity, and ensuring that these functional pieces can continue serving automotive enthusiasts for years to come. The automotive recycling industry depends on this careful approach to maintain the quality and reliability that keeps the used parts market thriving.
By following these professional techniques and investing in proper tools, you’ll join the ranks of skilled extractors who can remove valuable automotive audio equipment cleanly and efficiently, maximizing both the parts’ value and your success in the used automotive parts marketplace.


Leave a Reply
You must be logged in to post a comment.