Understanding Your Vehicle’s Electrical System: Starters vs Alternators
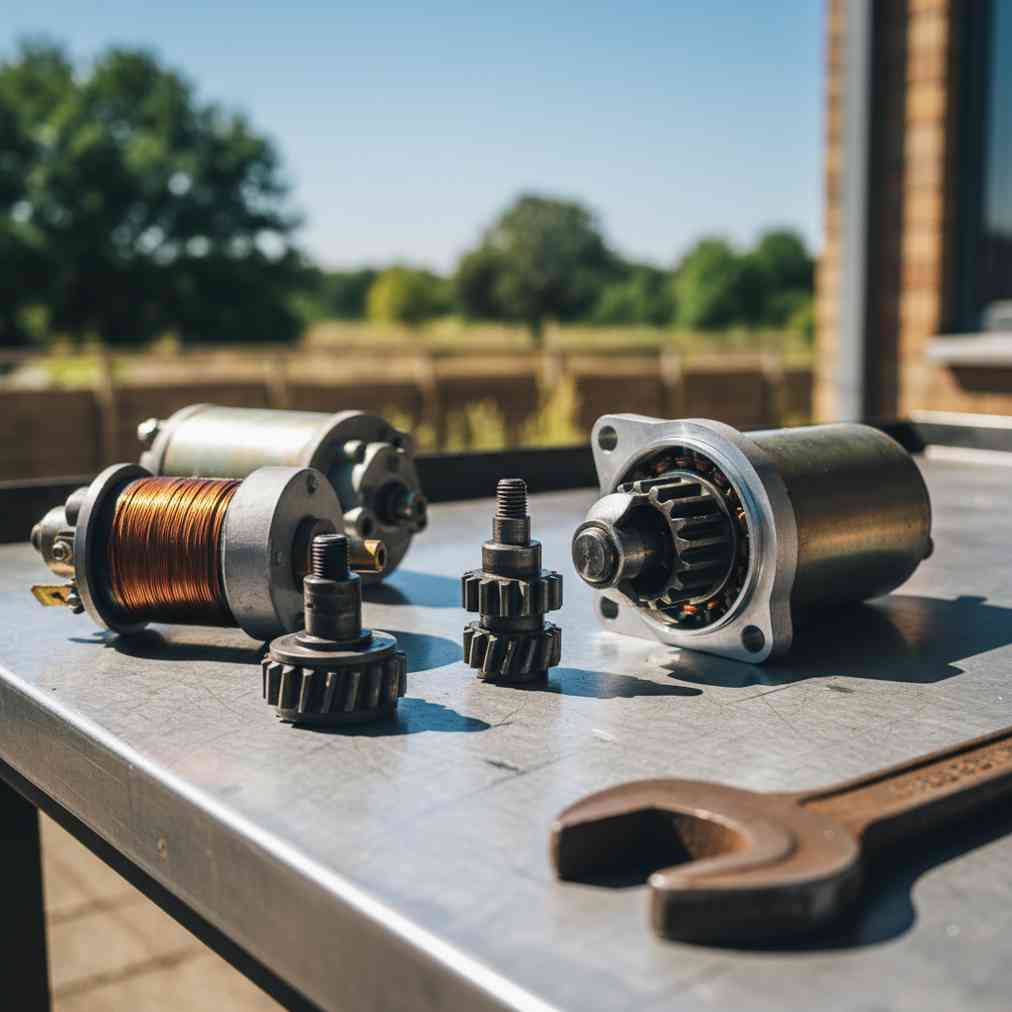
Before diving into the rebuilding process, it’s essential to understand how starters and alternators work together in your vehicle’s electrical system. The starter motor is an electric motor that uses a small gear (pinion) to engage with the engine’s larger ring gear. When you turn the ignition key, it converts electrical energy from the battery into mechanical energy, cranking the engine until it can run independently.
Once the engine is running, the alternator takes over the electrical responsibilities. Its primary function is to generate electrical current to recharge the battery and power the vehicle’s electrical systems, such as headlights, radio, and climate control. The alternator converts mechanical energy from the running engine into electrical energy, ensuring a continuous power supply.
Why Choose a Junkyard Donor Unit for Your Starter Rebuild
Using a junkyard donor unit for rebuilding your starter offers numerous advantages over purchasing new or remanufactured parts. OEM parts from salvage yards maintain the original specifications and quality standards that were designed for your specific vehicle.
- Cost-effectiveness: Junkyard starters cost 50-70% less than new units
- OEM Quality: Original Equipment Manufacturer parts ensure proper fitment
- Availability: Wide selection of compatible donors for various models
- Environmental Benefits: Reduces waste and conserves manufacturing resources
- Reliability: Reputable salvage yards test parts and often provide warranties
Essential Tools and Safety Equipment
Before beginning your starter rebuild project, gather the necessary tools and safety equipment to ensure a successful and safe working experience.
| Basic Tools | Safety Equipment | Specialized Items |
|---|---|---|
| Socket set (10mm-19mm) | Safety glasses | Multimeter |
| Screwdrivers (flathead/Phillips) | Work gloves | Battery for bench testing |
| Wire brushes | Apron or coveralls | Electrical contact cleaner |
| Pliers (needle-nose/standard) | Dust mask | High-temperature grease |
Comprehensive Inspection Guide for Starter Units
Proper inspection is crucial when selecting a donor starter from a junkyard. Understanding how these components work together will help you identify potential issues during inspection.
Visual Inspection Checklist
- Housing Condition: Look for cracks, corrosion, or damaged mounting points
- Pinion Gear: Inspect teeth for wear, chipping, or damage
- Electrical Connections: Check terminals for corrosion or looseness
- Solenoid Housing: Examine for physical damage or corrosion
- Drive Assembly: Ensure the pinion gear moves freely in one direction only
Electrical Testing Procedures
Before committing to a donor unit, perform these electrical tests to verify functionality:
- Bench Test: Apply 12V power to starter terminals to check rotation
- Solenoid Function: Verify the pinion extends and retracts properly
- Current Draw: Measure amperage draw during operation (should be 150-400 amps)
- Ground Circuit: Test for proper grounding through the housing
“Regular inspections are the first line of defense in preserving the longevity of your starter motor. A comprehensive check during your routine car maintenance can reveal early signs of wear and tear.” – Grimmer Motors
Step-by-Step Starter Rebuild Process
Rebuilding a starter using a junkyard donor unit requires patience and attention to detail. Follow these systematic steps to ensure a successful rebuild that will provide reliable service for years to come.
Step 1: Disassembly and Documentation
- Mark alignment points on the housing before disassembly
- Take photos of component placement for reference
- Remove solenoid by disconnecting electrical connections and mounting bolts
- Separate housing sections carefully to avoid damaging internal components
- Extract armature and note brush positioning
Step 2: Component Cleaning and Assessment
Thorough cleaning is essential for identifying wear patterns and determining which components can be reused or need replacement.
- Clean armature with electrical contact cleaner and wire brush
- Inspect commutator for scoring, burning, or uneven wear
- Check field coils for continuity using a multimeter
- Examine brushes for length and spring tension
- Test solenoid contacts for pitting or excessive wear
Step 3: Parts Selection and Replacement
Combine the best components from both your original starter and the donor unit to create an optimal rebuild. When looking for quality parts, consider visiting salvage yards near you for additional components if needed.
| Component | Inspection Criteria | Replacement Guidelines |
|---|---|---|
| Carbon Brushes | Length > 50% of original | Replace if worn below minimum |
| Brush Springs | Proper tension and no corrosion | Replace if weakened or damaged |
| Solenoid Contacts | Smooth surface, no pitting | File smooth or replace if severely damaged |
| Drive Assembly | Smooth operation, no binding | Replace if damaged or sticky |
| Bearings/Bushings | No play or roughness | Replace if worn beyond tolerance |
Step 4: Reassembly and Quality Control
- Apply high-temperature grease to bearing surfaces and drive mechanisms
- Install brushes carefully ensuring proper seating in holders
- Align housing marks to maintain proper magnetic field orientation
- Torque fasteners to manufacturer specifications
- Perform final bench test before installation
Bench Testing Your Rebuilt Starter
Before installing your rebuilt starter, conduct thorough bench testing to verify proper operation. This step can save you time and frustration by identifying issues before they become problems in your vehicle.
Testing Procedure
- Connect positive cable to the main starter terminal
- Ground the starter case to the negative battery terminal
- Apply 12V to solenoid small terminal to engage starter
- Listen for smooth operation without grinding or excessive noise
- Check pinion extension and retraction
- Measure current draw should be within specifications
If you need to sell your old starter core or other vehicle components, consider getting an instant quote for junk car parts to offset your rebuild costs.
Alternator Inspection for Complete System Health
While rebuilding your starter, it’s wise to inspect your alternator as well. Understanding the relationship between starters and alternators helps ensure your entire electrical system functions properly.
Key Alternator Inspection Points
- Voltage Output Test: Should produce 13.8-14.5 volts while running
- Bearing Condition: Listen for noise or roughness during rotation
- Physical Damage: Check for cracks in housing or broken pulley
- Belt Condition: Inspect drive belt for proper tension and wear
- Brush and Slip Ring Wear: Similar inspection to starter brushes
Installation Tips and Best Practices
Proper installation of your rebuilt starter is crucial for optimal performance and longevity. Follow these professional installation tips to ensure success.
- Clean all connections with wire brush and electrical cleaner
- Apply dielectric grease to terminals to prevent corrosion
- Torque mounting bolts to specification to prevent vibration damage
- Route wiring properly to avoid heat damage from exhaust components
- Test operation immediately after installation
Troubleshooting Common Starter Issues
Even with a quality rebuild, you may encounter issues. Understanding common problems and their solutions will help you diagnose and correct problems quickly.
| Symptom | Possible Cause | Solution |
|---|---|---|
| Clicking sound only | Faulty solenoid or low battery | Test solenoid, check battery voltage |
| Grinding noise | Damaged pinion or ring gear | Inspect and replace damaged components |
| Slow cranking | High resistance or worn brushes | Check connections, test current draw |
| No response | Open circuit or bad connections | Test continuity, clean connections |
| Starter stays engaged | Sticking solenoid or drive | Check solenoid operation, lubricate drive |
Cost Analysis: DIY Rebuild vs Professional Services
Understanding the financial benefits of a DIY starter rebuild using junkyard donors helps justify the time investment and demonstrates significant cost savings.
| Option | Typical Cost Range | Time Investment | Warranty |
|---|---|---|---|
| New OEM Starter | $300-$600 | 1-2 hours install | 1-3 years |
| Remanufactured Unit | $150-$300 | 1-2 hours install | 1-2 years |
| Professional Rebuild | $200-$400 | 2-3 days waiting | 1 year |
| DIY Junkyard Rebuild | $30-$80 | 4-6 hours total | Self-warranted |
Modern Developments in Starter Technology
While traditional starter rebuilding techniques remain relevant, it’s important to understand emerging technologies. Some luxury vehicles now use integrated starter-generator systems that combine starter and alternator functions, though these typically require specialized dealership service.
Modern vehicles may also feature:
- Start-Stop Systems: Require heavy-duty starters for frequent cycling
- Gear Reduction Starters: Use planetary gears for higher torque
- Permanent Magnet Motors: Replace field coils with permanent magnets
- Enhanced Solenoids: Feature improved contact materials and designs
Environmental Impact and Sustainability
Choosing to rebuild starters using junkyard donor parts contributes significantly to environmental sustainability. This practice reduces the demand for new manufacturing, which requires substantial energy and raw materials.
- Resource Conservation: Reduces copper, steel, and rare earth element mining
- Energy Savings: Manufacturing new starters requires 10x more energy than rebuilding
- Waste Reduction: Keeps functional components out of landfills
- Carbon Footprint: Significantly lower than new part production and shipping
Expert Tips for Long-Term Success
To maximize the lifespan of your rebuilt starter, follow these professional recommendations from automotive experts:
“OEM parts are the parts that were installed in your car when it was manufactured. This means that they are designed specifically for your make and model, and are often of higher quality than aftermarket parts.”
- Use quality lubricants designed for high-temperature applications
- Maintain clean electrical connections to prevent voltage drop
- Address engine issues that cause hard starting to reduce starter strain
- Keep battery fully charged to minimize starter workload
- Perform regular inspections during routine maintenance
Conclusion: Mastering the Art of Starter Rebuilding
Rebuilding a starter using a junkyard donor unit represents an excellent opportunity to develop mechanical skills while achieving substantial cost savings. Understanding automotive electrical systems and following proper procedures ensures reliable results that can last for years.
The process requires patience, attention to detail, and the right tools, but the rewards extend beyond mere cost savings. You’ll gain valuable knowledge about your vehicle’s electrical system, contribute to environmental sustainability, and develop confidence in handling automotive repairs.
Remember that proper maintenance of both starters and alternators ensures optimal electrical system performance. With careful inspection, quality parts selection, and proper assembly techniques, your rebuilt starter can provide service comparable to new units at a fraction of the cost.
Whether you’re a weekend mechanic looking to expand your skills or simply trying to keep an older vehicle running economically, starter rebuilding using junkyard donors offers an excellent solution that benefits both your wallet and the environment.


Leave a Reply
You must be logged in to post a comment.