DIY Crash Repair Using Junkyard Parts: Fix Your Fender for Under $100 (2025 Guide)
A fender replacement doesn’t have to break the bank. Body shops often charge hundreds for repairs, and new OEM fenders can cost $300–$600 before labor. But if you’re willing to visit a junkyard and put in some DIY effort, you can replace a damaged fender for under $100. This guide covers everything from finding the right part, [...]
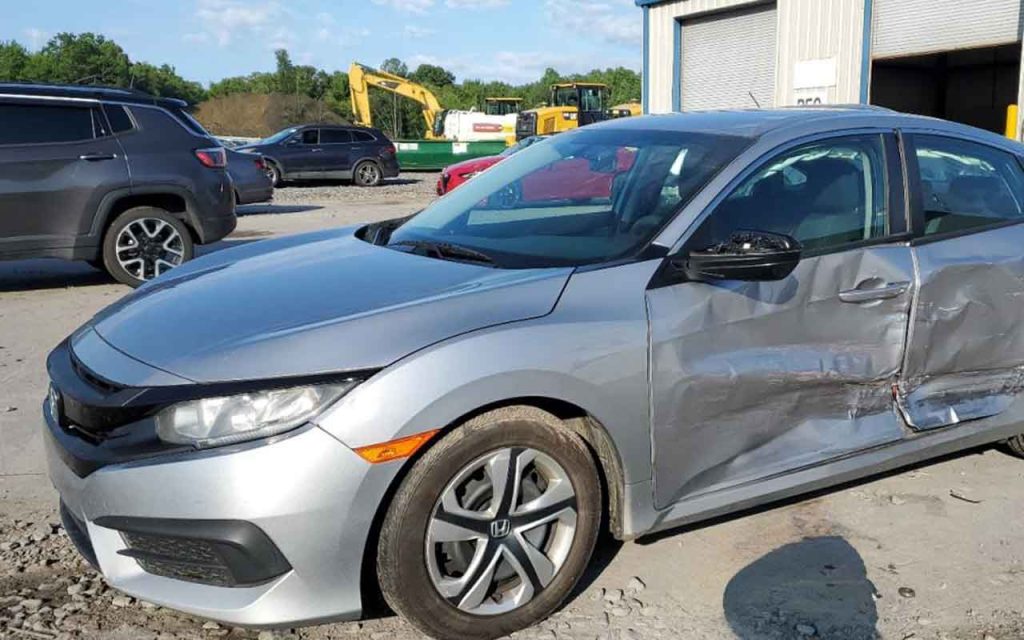
Photo by U-Pull-It
A fender replacement doesn’t have to break the bank. Body shops often charge hundreds for repairs, and new OEM fenders can cost $300–$600 before labor. But if you’re willing to visit a junkyard and put in some DIY effort, you can replace a damaged fender for under $100.
This guide covers everything from finding the right part, pulling it safely, prepping it for installation, and fitting it back on your car—all while keeping costs low.
Why Choose a Junkyard Fender?
Opting for a junkyard fender offers several advantages:
Cost Savings: Junkyard fenders typically cost $50–$100, compared to $300+ for a new part.
OEM Quality: You’re getting a factory part designed for your car, not a thinner aftermarket copy.
Potential Color Match: Sometimes you’ll find a perfect match in your car’s paint code, saving on paint costs.
Environmentally Friendly: Recycling used auto parts helps reduce waste.
Not all fenders are created equal. Before heading to the junkyard, research:
Model years that share parts: Many vehicles use identical fenders across multiple model years
Trim level differences: Base models vs. premium trims may have different mounting points
Regional variations: Some cars have different fender designs for different markets
Facelift changes: Mid-generation updates often affect fender compatibility
Common Fender Damage Assessment
Determine if your fender is worth replacing vs. repairing:
Replace if you have: * Rust holes or extensive corrosion * Collision damage affecting structural mounting points * Deep creases that would require extensive bodywork * Multiple dents requiring more repair cost than replacement
Consider repair if: * Minor surface rust (can be sanded and treated) * Small dents that can be pulled or filled * Paint damage only
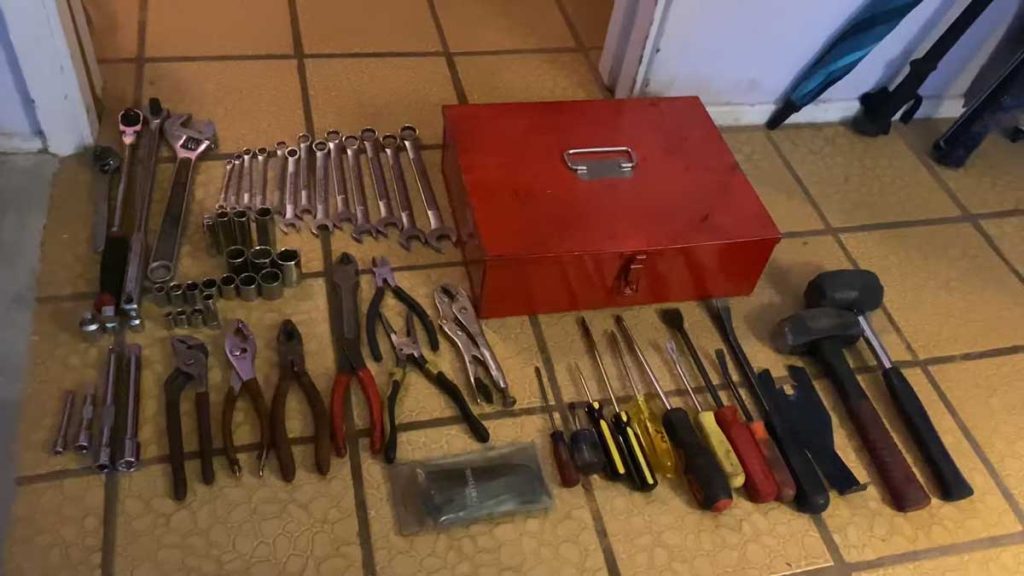
Essential Tools for the Job
Junkyard Removal Tools
Bring these tools with you to the junkyard and keep them handy for installation:
Ratchet set (metric & SAE) – 8mm, 10mm, 12mm, 13mm are most common
Screwdrivers (flathead and Phillips)
Trim panel removal tools or plastic pry tools
Penetrating oil (WD–40 or PB Blaster)
Pliers (needle-nose and adjustable)
Pry bar (for gently separating stuck panels)
Work gloves & safety glasses
Socket extensions (for hard-to-reach bolts)
Magnetic parts tray (to avoid losing bolts)
Additional Home Installation Tools
Floor jack and jack stands
Torque wrench (for proper bolt tightening)
Wire brush (for cleaning bolt holes)
Fine-grit sandpaper (320, 400, 600 grit)
Tack cloth or microfiber cloths
Masking tape and plastic sheeting
💡 Pro Tip: Many fenders are bolted under the hood, near the bumper, and behind the wheel well liner. Be prepared to remove these panels.
Step 1: Finding the Right Fender
Research Before You Go
Check Junkyard Inventory: Many yards have online databases or call-ahead services
Verify Compatibility: Match the year, make, and model exactly
Look for Interchangeability: Some fenders fit multiple years or trims
Check Paint Codes: Look for your car’s paint code on the door jamb sticker
What to Look For at the Junkyard
Quality Indicators: * Minimal rust, especially around mounting points * Straight body lines with no major creases * Intact mounting hardware and clips * No evidence of previous collision repair
Red Flags: * Bondo or body filler patches * Rust holes or extensive corrosion * Bent or damaged mounting tabs * Evidence of frame damage around the fender area
📌 Example: A 2008–2012 Ford Escape fender may fit across trims with no modification, but always verify before purchasing.
Yard Rules: Most junkyards ban power tools—stick with hand tools
Vehicle Stability: Ensure the vehicle is stable before working underneath
Sharp Edges: Watch for jagged metal and broken plastic
Removal Process
Front End Access
Pop the hood and locate fender mounting bolts (usually 3–5 bolts along the inner fender)
Remove the headlight assembly if it blocks access to bolts
Disconnect any wiring to side marker lights or turn signals
Wheel Well Access
Turn the steering wheel full lock away from the work side
Remove wheel well liner fasteners (plastic clips, screws, or bolts)
Locate hidden bolts inside the wheel arch
Body Panel Connections
Loosen bumper cover where it attaches to the fender
Remove door seal if it overlaps the fender edge
Check for additional clips along the fender-to-body seam
Dealing with Stuck Hardware
Penetrating Oil: Spray liberally and wait 15–20 minutes
Heat Application: Use a small torch carefully on stubborn bolts (if yard allows)
Impact Method: Use a breaker bar for extra leverage
Cut as Last Resort: Some plastic clips may need to be cut and replaced
Step 3: Prepping Your Junkyard Fender
Initial Inspection and Cleaning
Once you bring the fender home:
Thorough Inspection: Look for hidden rust, dents, or damage you missed at the yard
Clean Completely: Use soap, water, and automotive degreaser
Remove Old Hardware: Clean all mounting points and replace damaged clips
Surface Preparation
For Painting:
Sand with 220 grit to remove old paint and create tooth for primer
Fill small dents with automotive body filler
Prime exposed metal within 24 hours to prevent rust
Wet sand primer with 400 grit for smooth finish
For Color-Matched Fenders:
Light scuff with 320 grit to blend edges if needed
Polish and compound to restore shine
Apply protective coating to prevent future damage
Paint Process (If Needed)
Materials Required: * Automotive primer (self-etching for bare metal) * Base coat in your vehicle’s color code * Clear coat (2K urethane for durability) * Wet sanding blocks and tack cloths
Process: 1. Apply primer in thin, even coats (2–3 coats) 2. Wet sand primer with 400 grit between coats 3. Apply base coat (2–3 coats, following flash times) 4. Apply clear coat (2–3 coats for depth and protection) 5. Wet sand and polish final coat if needed
⚠️ Important: If the junkyard fender still has factory primer (ecoat), scuff with a Scotch-Brite pad before applying new paint.
Step 4: Installing the Fender
Pre-Installation Setup
Clean your vehicle’s mounting points with a wire brush
Apply anti-seize compound to bolt threads
Have all hardware ready including any clips you had to cut during removal
Installation Process
Positioning and Alignment
Lift fender into position (having a helper makes this much easier)
Thread all bolts loosely – don’t tighten any until all are started
Check door gaps – should be consistent from top to bottom
Verify hood alignment – gaps should match the opposite side
Ensure bumper alignment – no gaps or overlaps at connection points
Final Assembly
Tighten bolts gradually in a cross pattern to spec (typically 15–25 ft-lbs)
Reinstall headlight assembly and test functionality
Replace wheel well liner and secure all fasteners
Reconnect any electrical connections
Install bumper cover and verify proper fit
Test all doors and hood for smooth operation
Post-Installation Checks
Walk around inspection for gaps and alignment
Functional test of lights, doors, and hood
Road test to check for any rattles or loose components
Final detail to remove fingerprints and protect the finish
Troubleshooting Common Installation Issues
Alignment Problems
Door Won’t Close Properly: * Loosen fender bolts and adjust position * Check for interference from wire harnesses * Verify door hinges aren’t damaged
Hood Gap Issues: * Adjust hood striker and latch mechanism * Check if fender is sitting too high or low * Verify mounting points aren’t damaged
Bumper Fit Problems: * Check for missing or damaged mounting clips * Verify you have the correct year fender * Look for bent mounting tabs that need straightening
Hardware Issues
Stripped Bolt Holes: * Use thread repair inserts (Helicoils) * Step up to next size bolt with washers * Use rivnuts for plastic mounting points
Missing Fasteners: * Visit auto parts store with samples for matching * Check online forums for part numbers * Consider universal clips for non-critical attachments
Estimated Cost Breakdown (2025 Prices)
Item
Cost Estimate
Junkyard fender
$50–$100
Primer & paint supplies
$30–$50
Hardware (if needed)
$10–$20
Sandpaper/supplies
$15–$25
Total
$105–$195
Cost-Saving Tips
Find color-matched fenders to eliminate paint costs
Buy paint supplies in bulk if doing multiple panels
Rent or borrow specialized tools rather than buying
Shop multiple junkyards for the best prices and selection
👉 If you find a matching color at the junkyard, you can keep the total under $100.
When to Call a Professional
While fender replacement is generally DIY-friendly, consider professional help if:
Structural damage affects mounting points
Multiple panels need replacement and alignment
Advanced paint matching is required for show-quality finish
Electrical integration is complex (adaptive headlights, sensors)
Frame damage is suspected
Long-Term Maintenance Tips
Protecting Your Investment
Regular washing to prevent salt and debris buildup
Annual wax application to protect paint
Touch up stone chips immediately to prevent rust
Inspect mounting bolts annually for loosening
Preventive Measures
Park carefully to avoid parking lot damage
Use car covers in harsh weather
Address minor damage quickly before it spreads
Conclusion
Replacing a fender with junkyard parts is one of the most budget-friendly DIY crash repairs you can take on. With patience, proper preparation, and this comprehensive guide, you can restore your car’s appearance while saving hundreds compared to body shop costs.
The key to success lies in thorough preparation, careful part selection, and methodical installation. Take your time with alignment and don’t rush the process—a well-installed junkyard fender can look and perform just as well as a new OEM part.
Remember that this repair not only saves money but also gives you valuable mechanical experience and the satisfaction of completing a significant automotive repair yourself.
Frequently Asked Questions (FAQs)
Q: How do I know if a junkyard fender will fit my car? A: Use your VIN or part number to cross-check compatibility. Many junkyards have interchange manuals or online databases that show which years and models share parts. Always verify the mounting point configuration before purchasing.
Q: Are junkyard fenders safe? A: Yes—fenders are non-structural panels that don’t affect crash safety. As long as they mount securely and aren’t rusted through at attachment points, they’re perfectly safe to use.
Q: Can I remove a fender without taking off the bumper? A: Usually, the bumper cover needs to be loosened or partially removed since mounting bolts often hide behind it. Complete removal isn’t always necessary, but access is required.
Q: Do I need to paint a junkyard fender? A: Not if you find one in your exact color code. However, even matching colors may need blending due to age and weathering differences. Budget $30–$50 for paint if needed.
Q: How long does this repair typically take? A: Plan for a full weekend—4–6 hours for removal and installation, plus additional time for prep work and painting if required. First-time DIY repairs often take longer.
Q: What if I can’t find the right fender at a junkyard? A: Expand your search to multiple yards, check online marketplaces like Car-Part.com, or consider slightly damaged fenders that can be repaired for less than buying new.
Q: Can I do this repair in my driveway? A: Yes, this is an ideal driveway repair. You’ll need level ground and space to work, but no special facilities are required. A garage is helpful for painting but not essential.